How to Draw a Cat in Pencil - Three Easy Master Classes for Beginners
Drawing from ancient times is considered one of the most popular types of art, which allows a person to express his feelings with a picture. In addition to aesthetic satisfaction, drawing classes can bring additional income.
Many talented artists receive huge royalties, exhibiting their paintings at various exhibitions. To become a great master of painting requires extensive training. Many parents dream of their child also reaching out to the wonderful world of art by developing their artistic abilities. It takes a lot of effort and effort to develop your young artist's talent.
You need to constantly work with your child, making the tasks more difficult in stages. It is necessary to study according to the principle from simple to complex, without skipping the intermediate stages. A great help in the training of young talents today is also the Internet, where you can get a lot of useful knowledge.

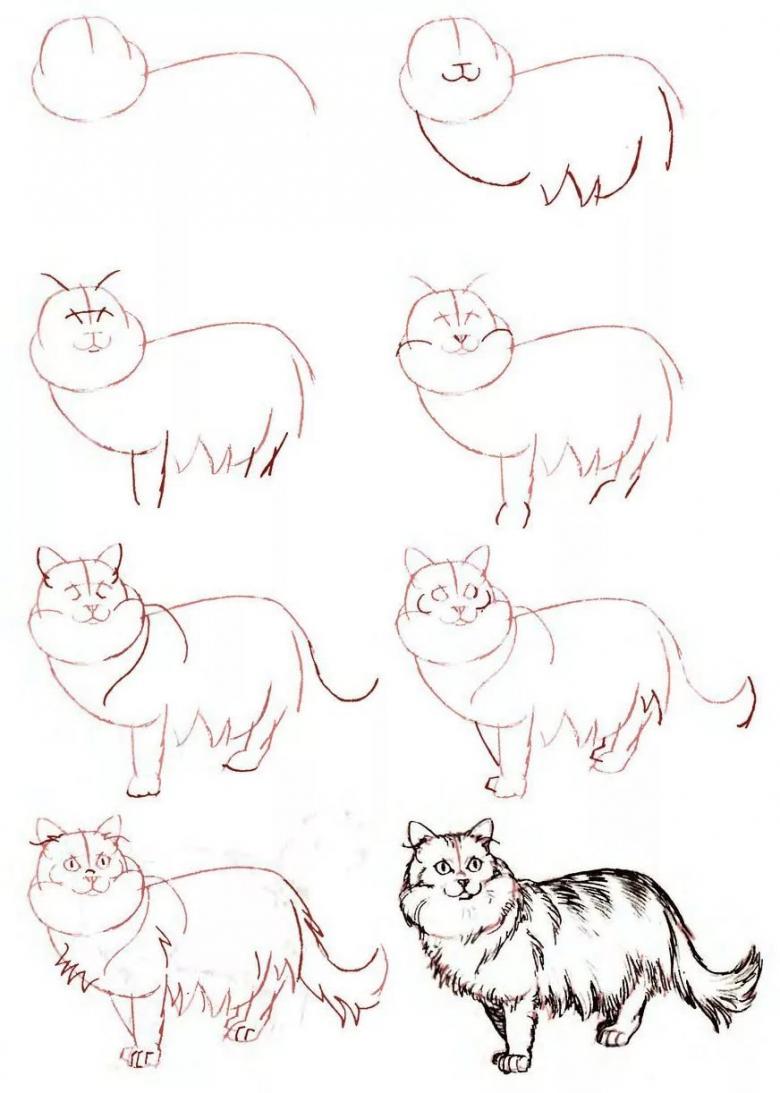
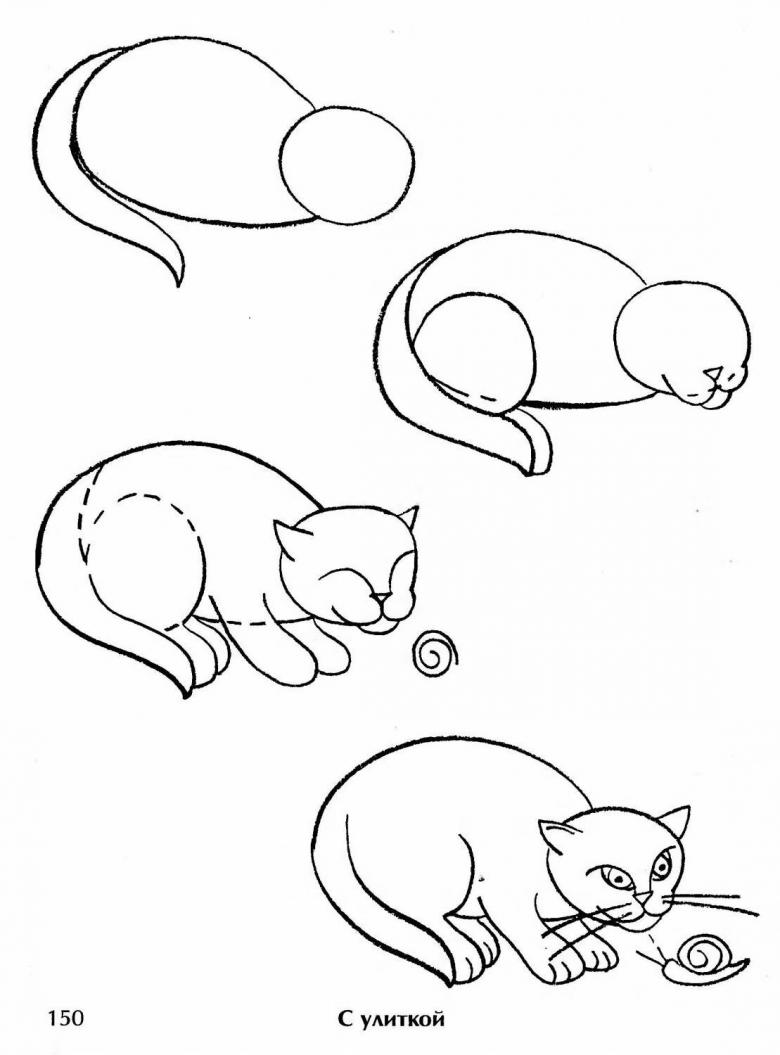
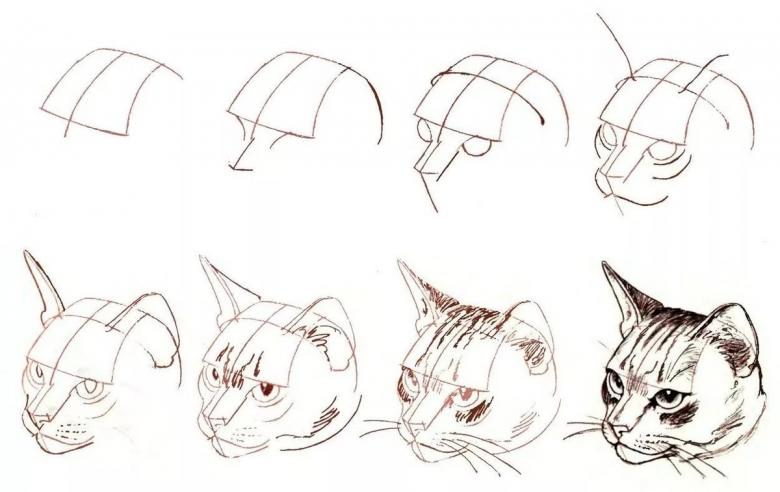
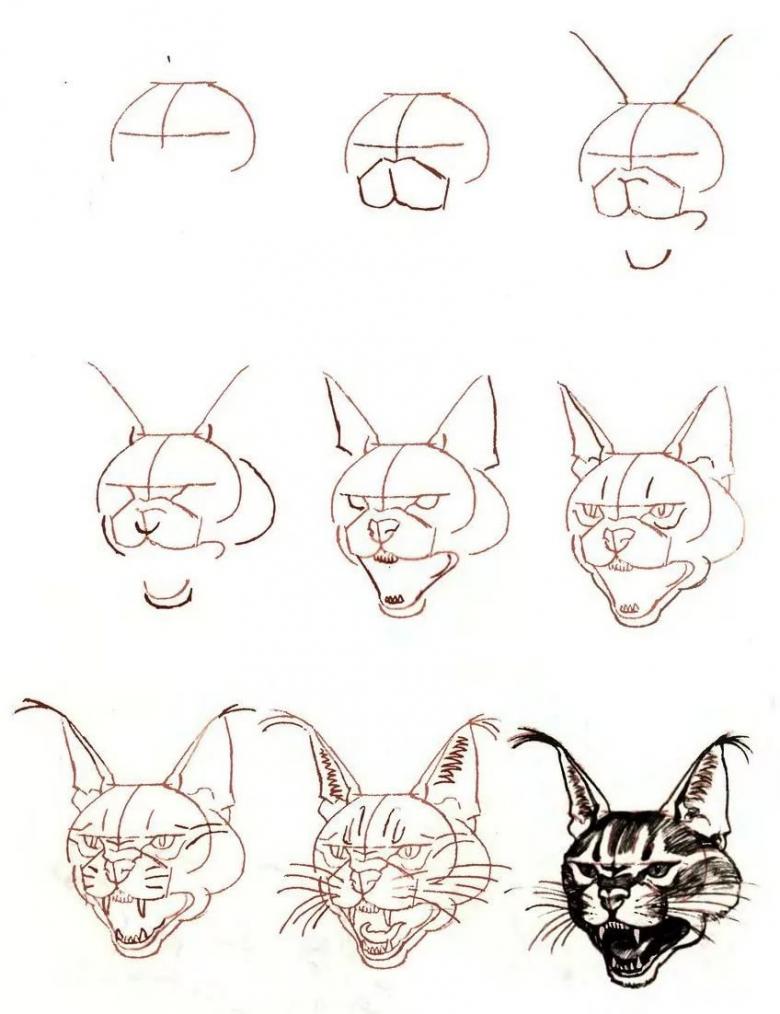
In our lesson today, for example, young artists, as well as their parents, will learn how to draw a simple pencil cat in different angles. To begin, let's introduce you to the basic principles of drawing animals on paper or drawing board.
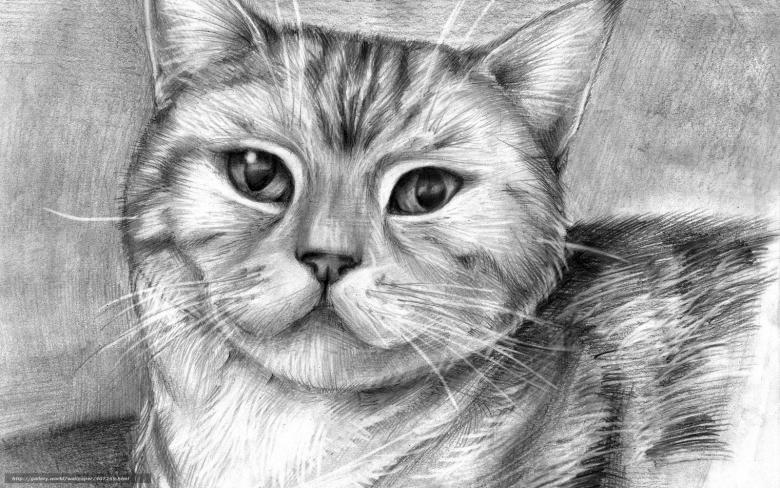
First, a drawing of any complexity is created with the help of simple geometric shapes. These include: square, circle, triangle. Children need to practice drawing simple shapes on paper, drawing straight lines. At the initial stage you can use a ruler to get the skill of step-by-step drawing.
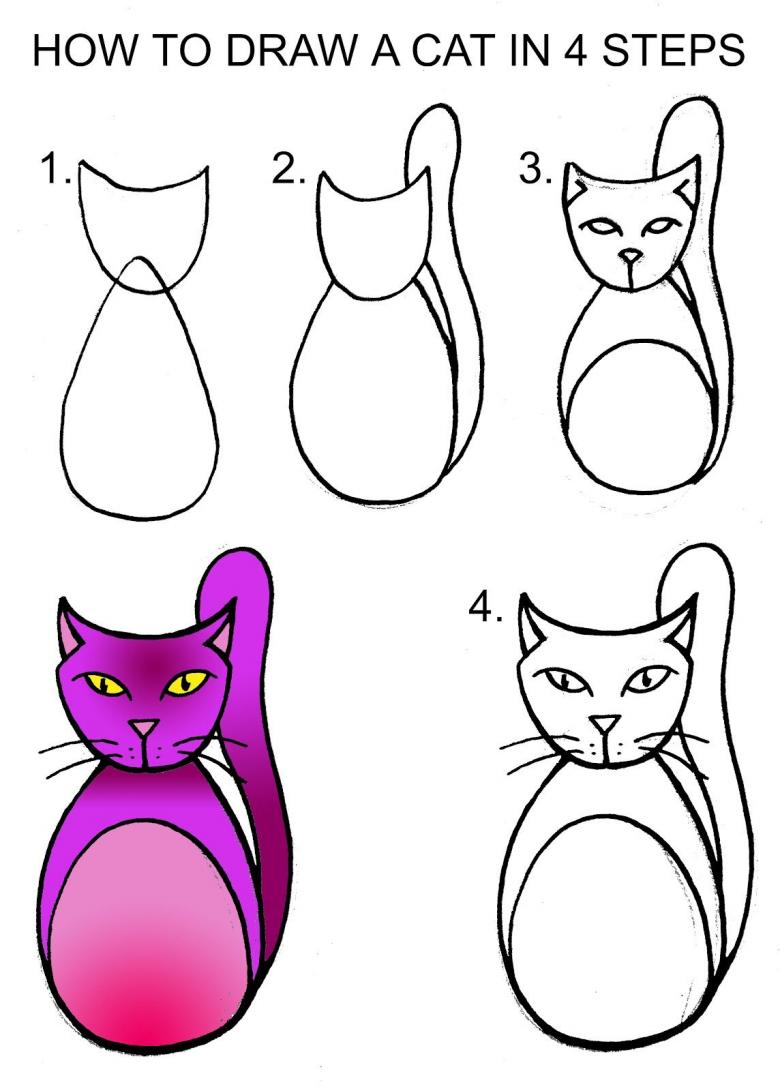
Second, each object in the picture has certain dimensions. For example, the head of the kitten should be smaller than its torso.Third, it's best to start drawing a cat from the head. The next step is to draw the other parts of the figure. And now let's move on to practical exercises.
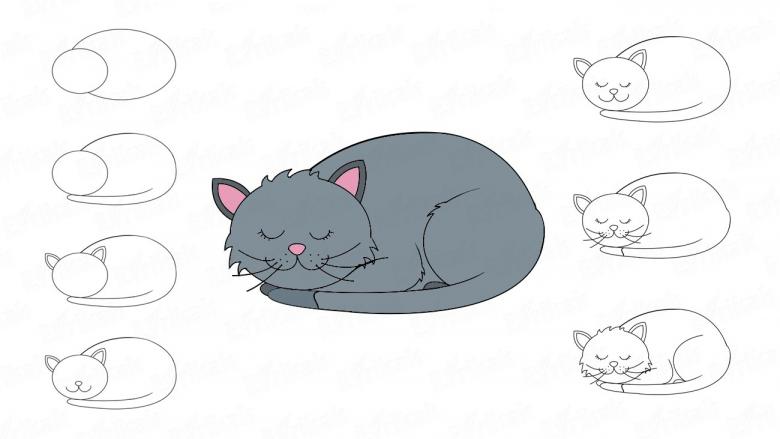
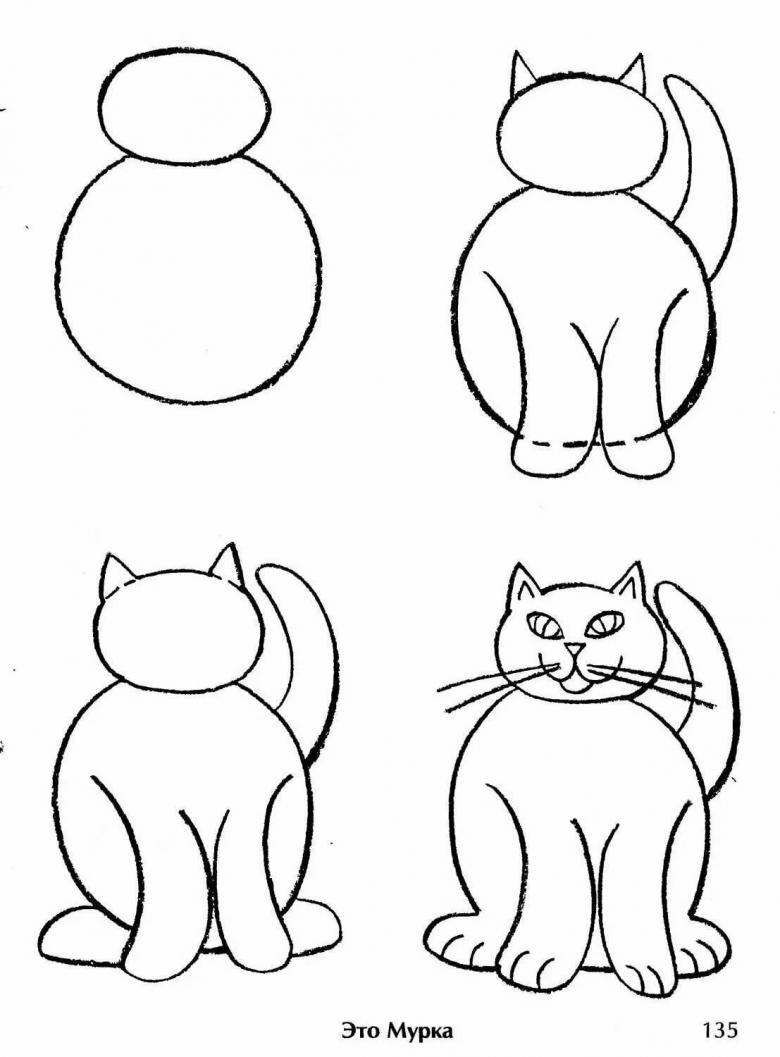
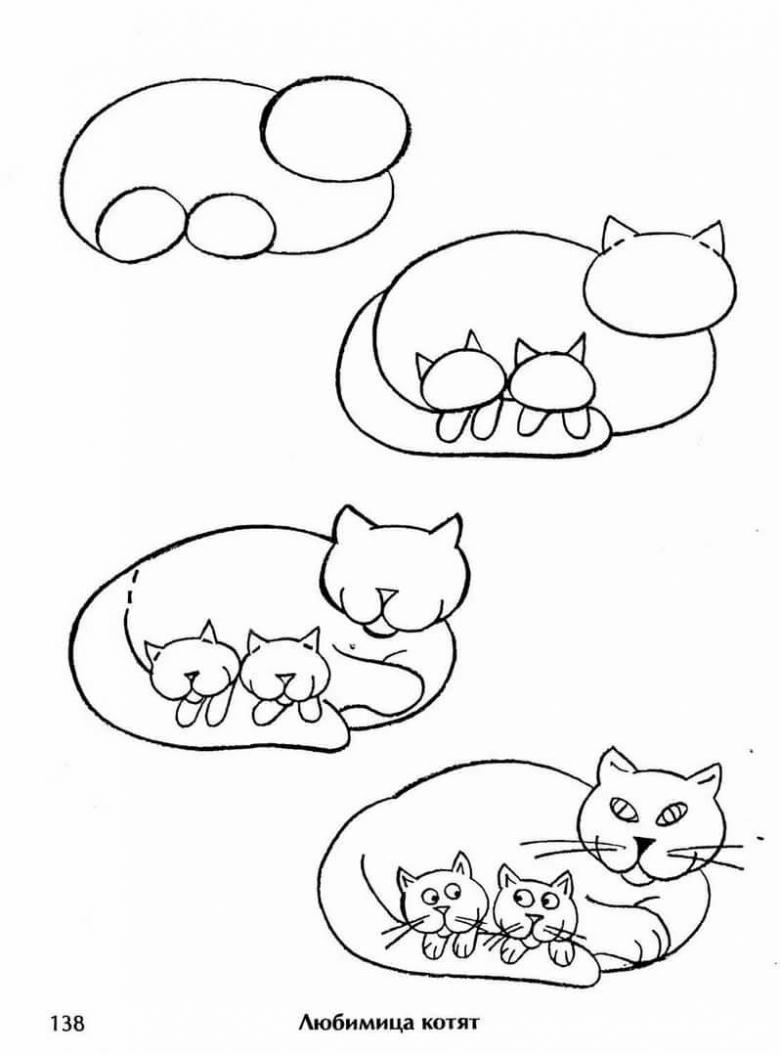
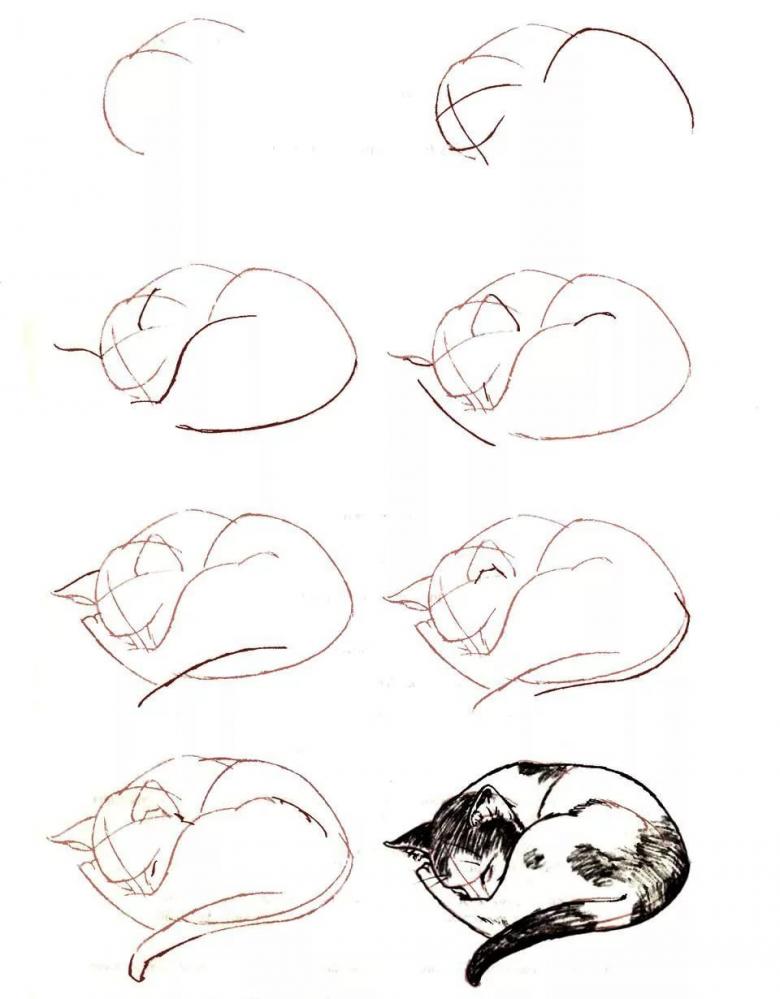
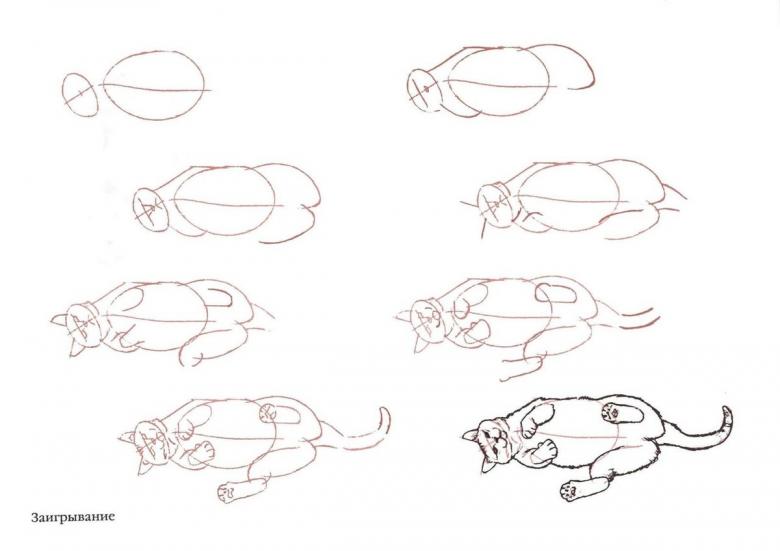
Drawing a sleeping cat step by step
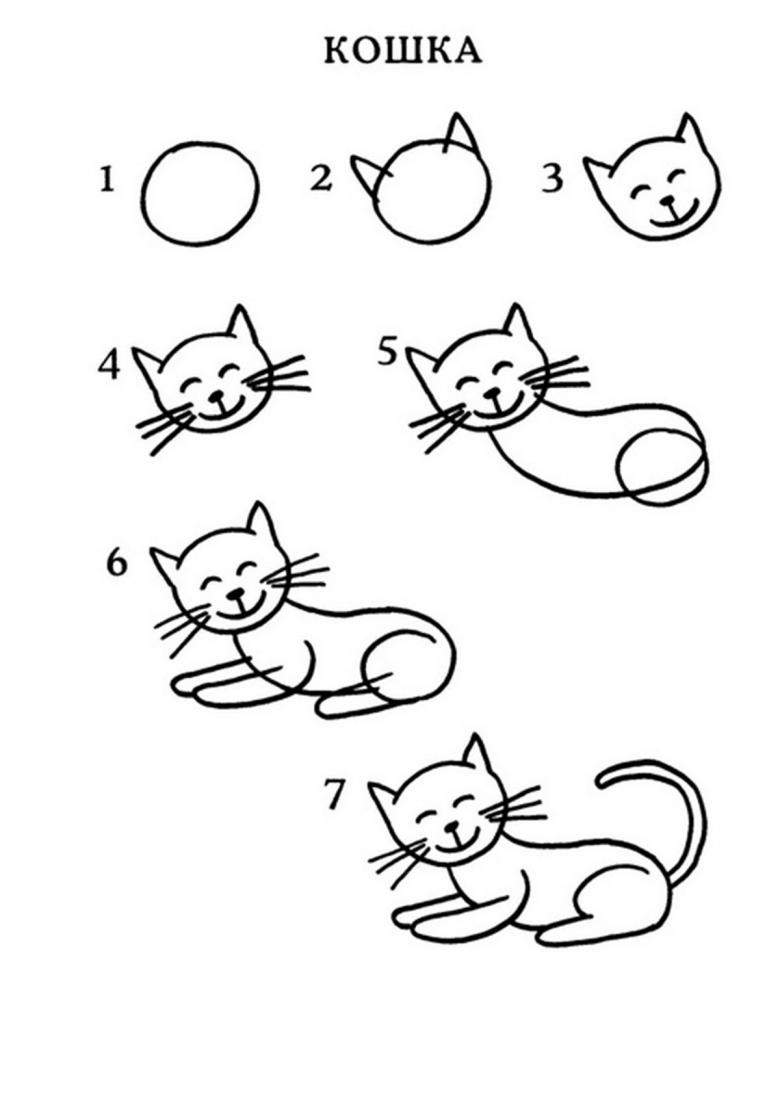
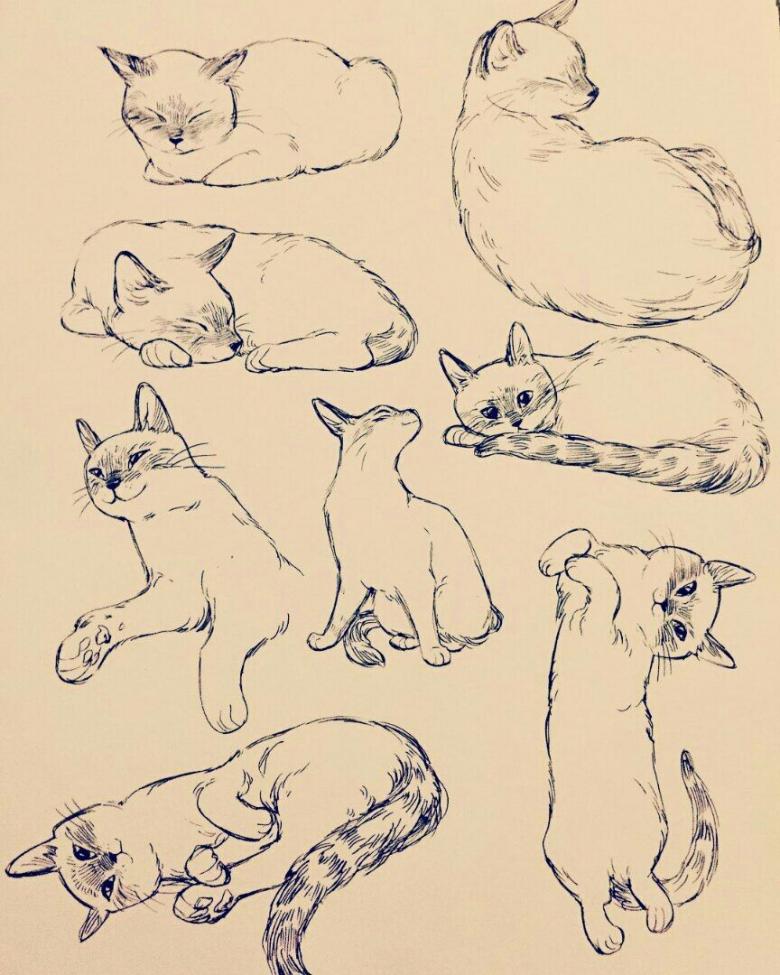
- Draw a large circle, and inside a smaller circle.
- Draw two small triangles to the inner circle. These will be the ears of our cat.
- Inside the circle design eyes, nose and mustache. This is done with arcs, triangles and lines.
- Draw the tail. The drawing is ready.

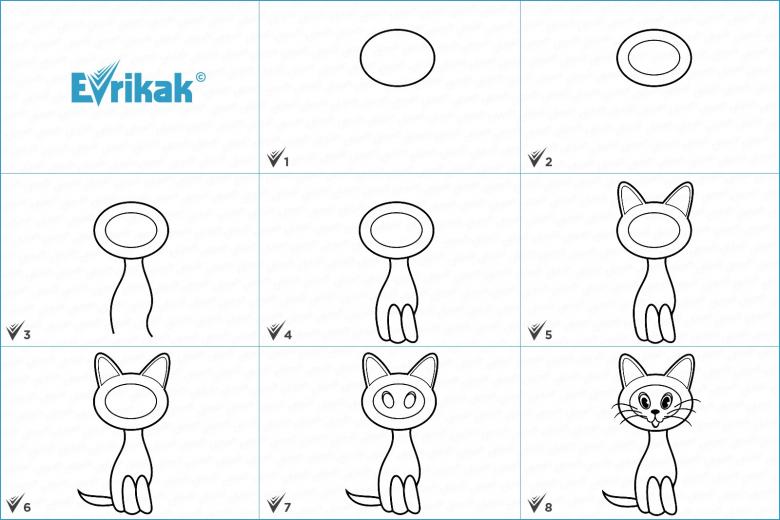
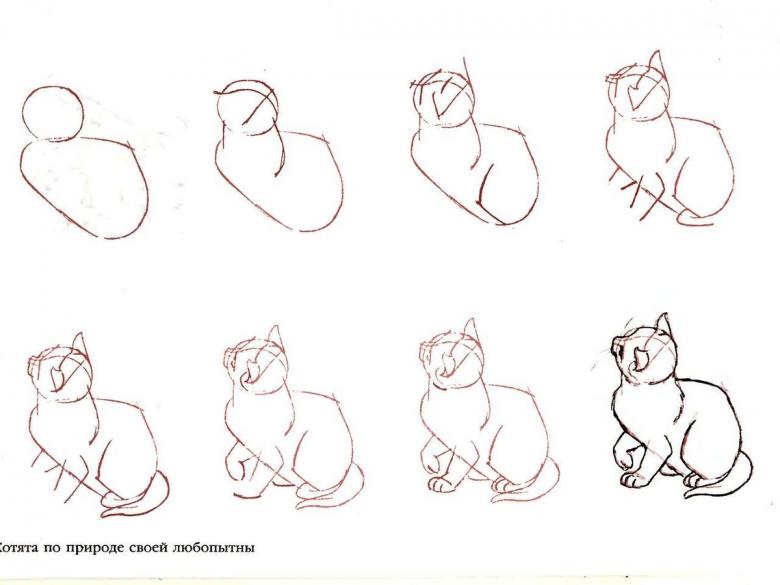
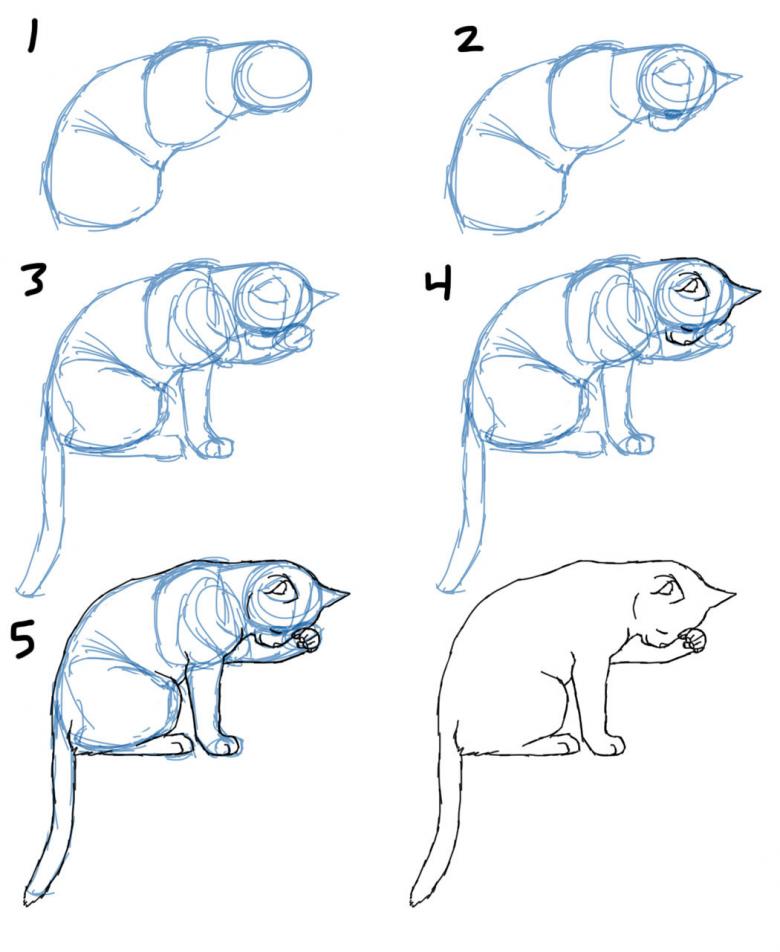
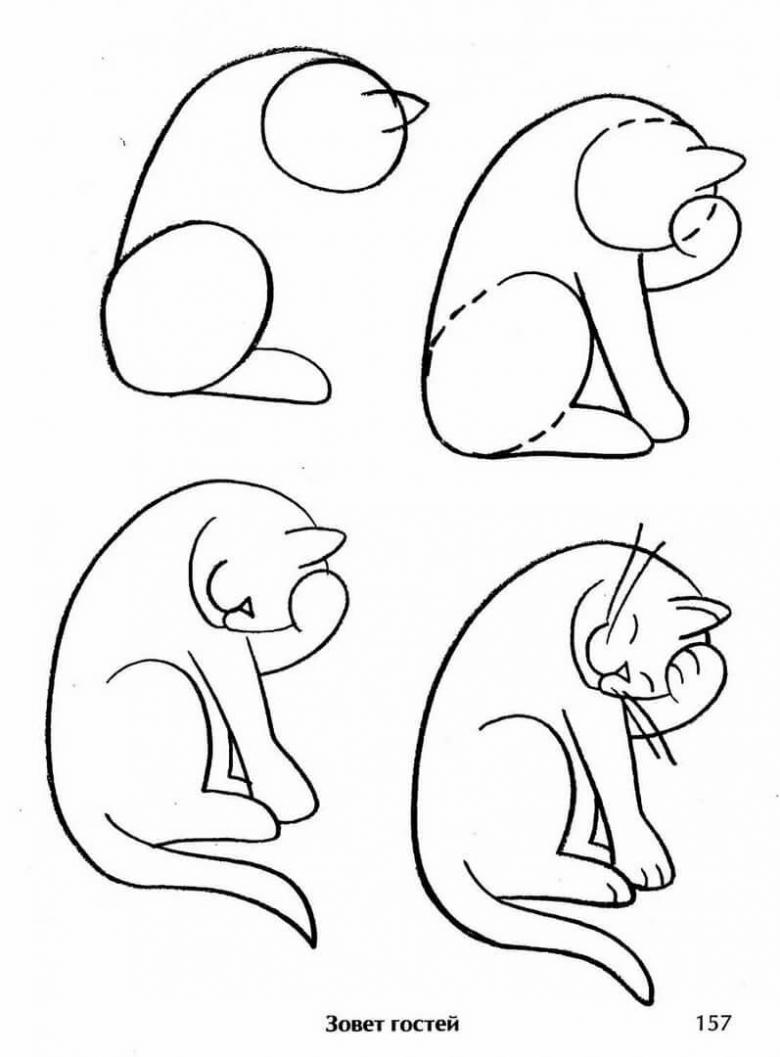
Drawing a cat in a sitting position in 5 steps
- First draw a circle. This will be the head of our cat. Next, draw triangles symbolizing the ears.
- Draw the top and bottom parts of the body of the cat. To do this, another circle is drawn under the head, and below it an oval. These figures are smoothly connected.
- Ahead draw lines for the front paws of the animal.
- Back to the head of the cat. On the sides draw triangles, so that the muzzle took a slightly elongated shape. Inside the circle depict the eyes, nose, mouth and mustache.
- To the body, draw a fluffy tail. Our beautiful cat is ready.

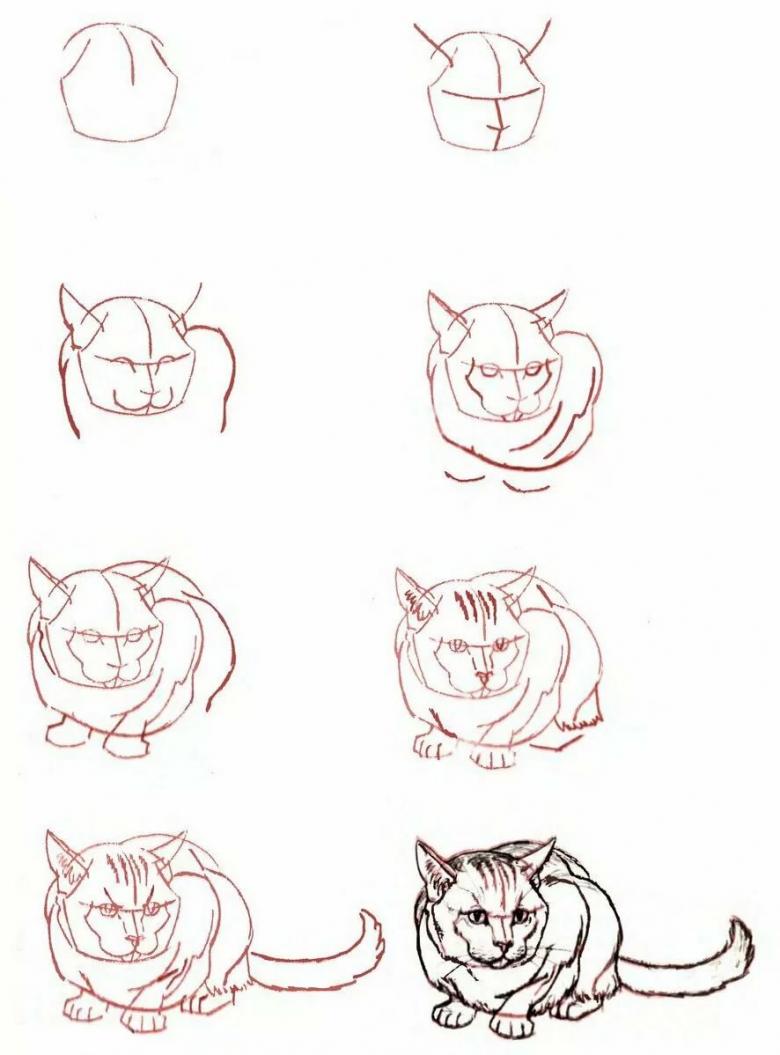
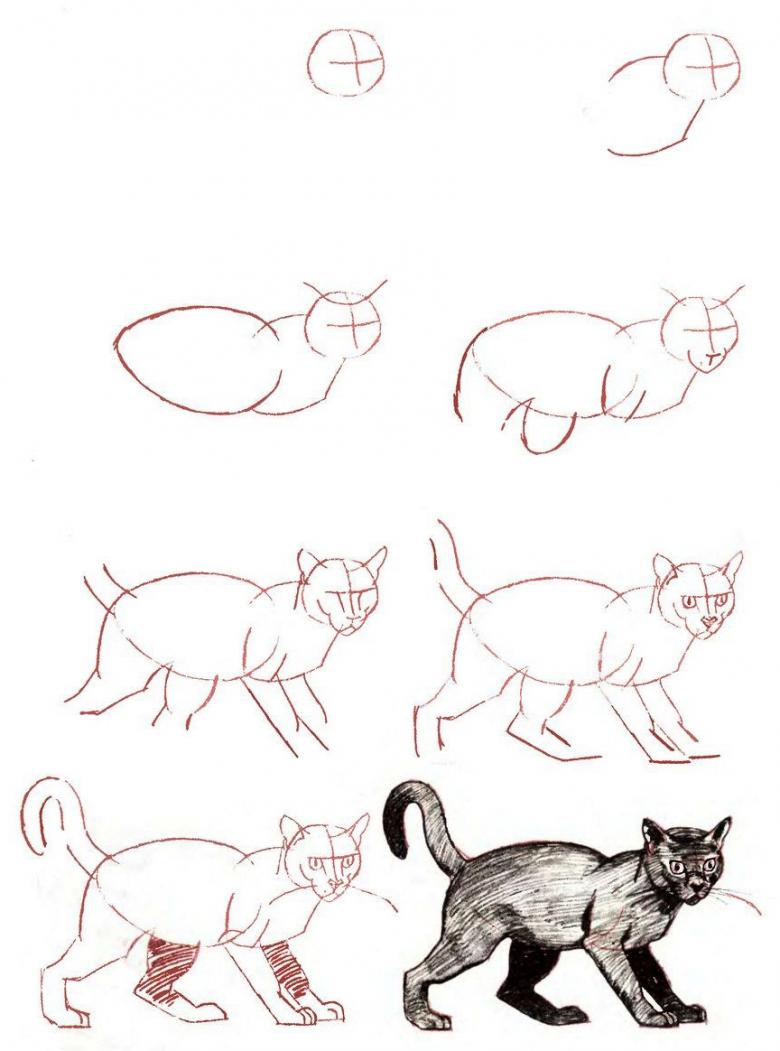
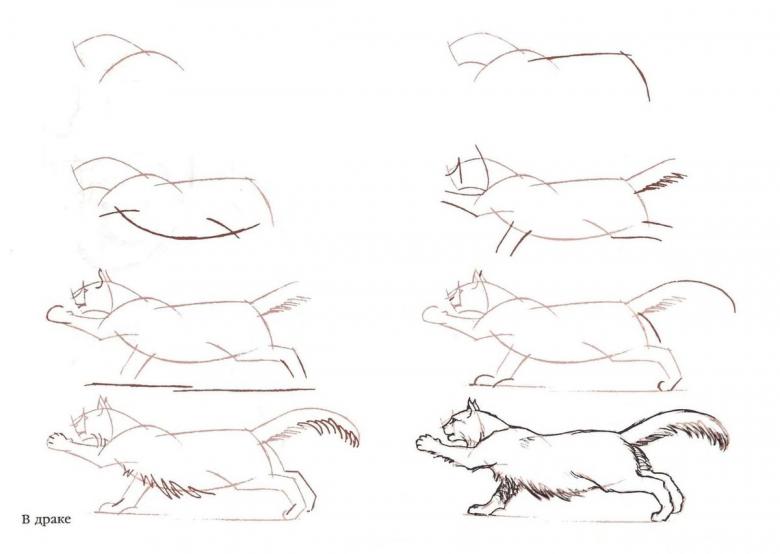
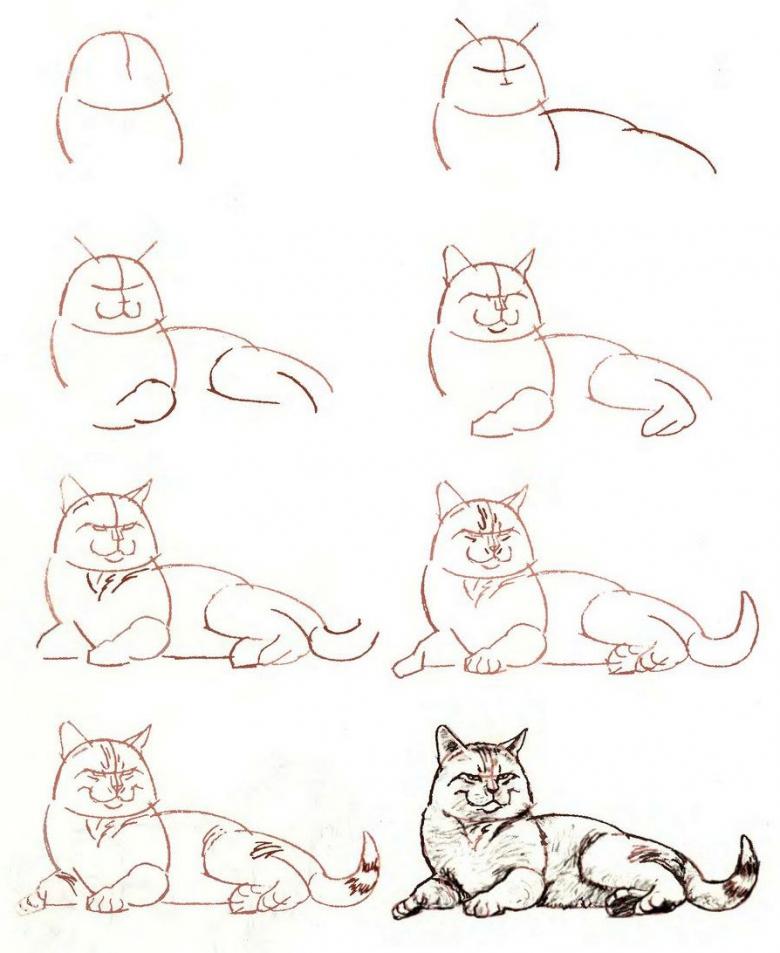
Drawing a cat in dynamics.
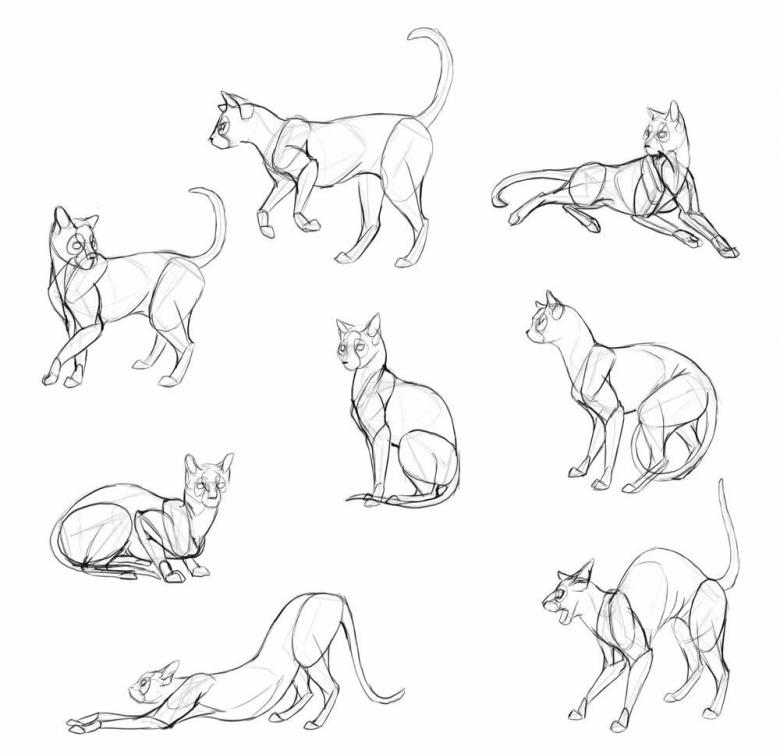
Now let's make it more difficult. Try to draw a cat with motion.
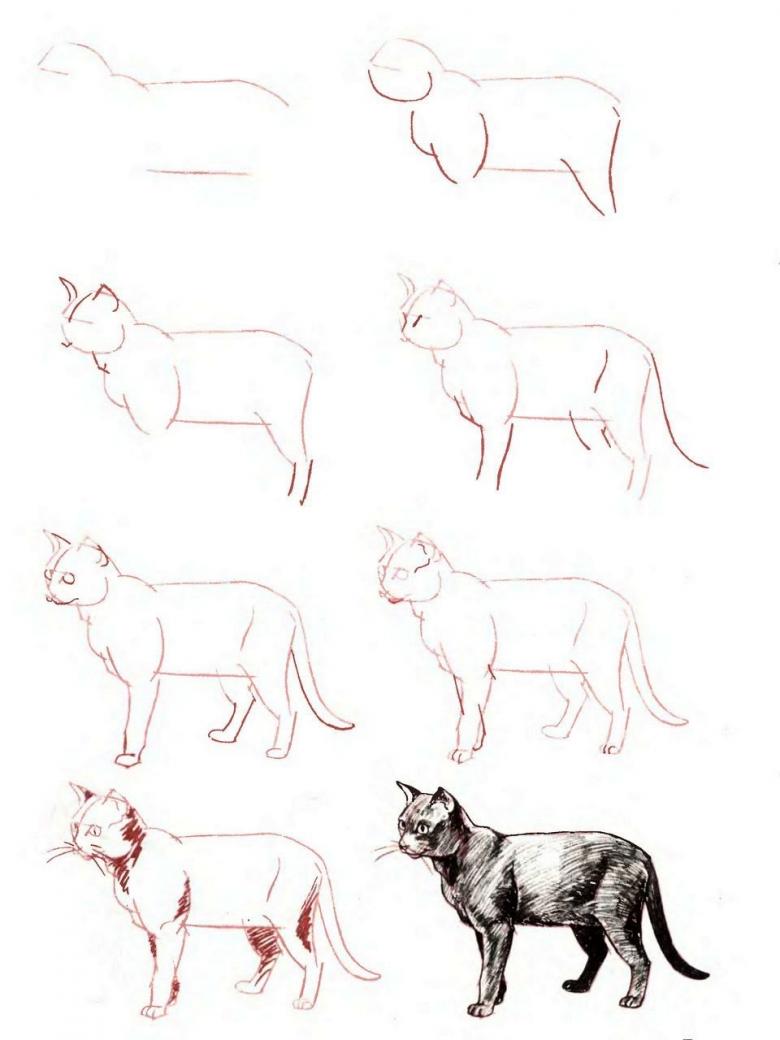
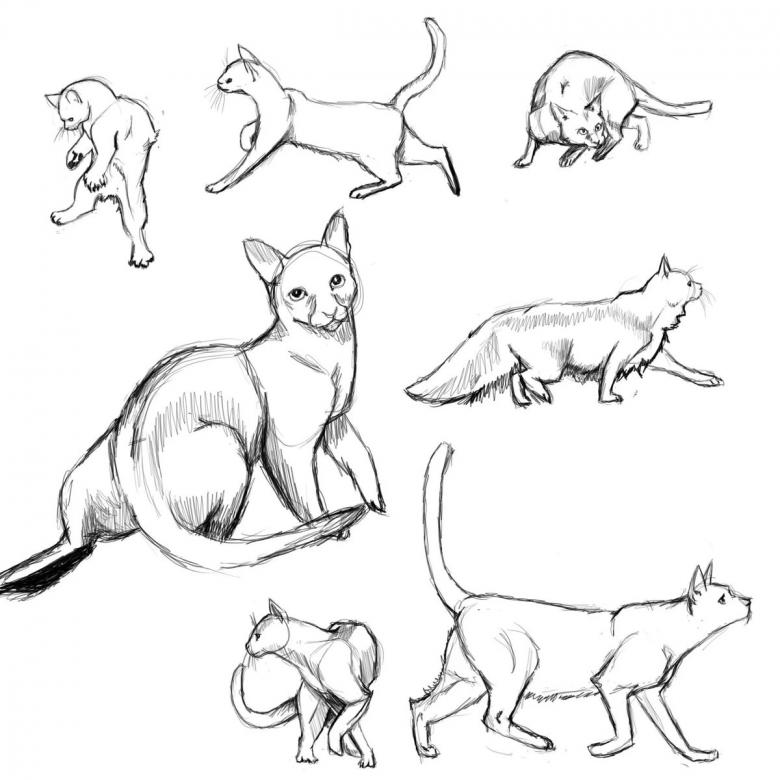
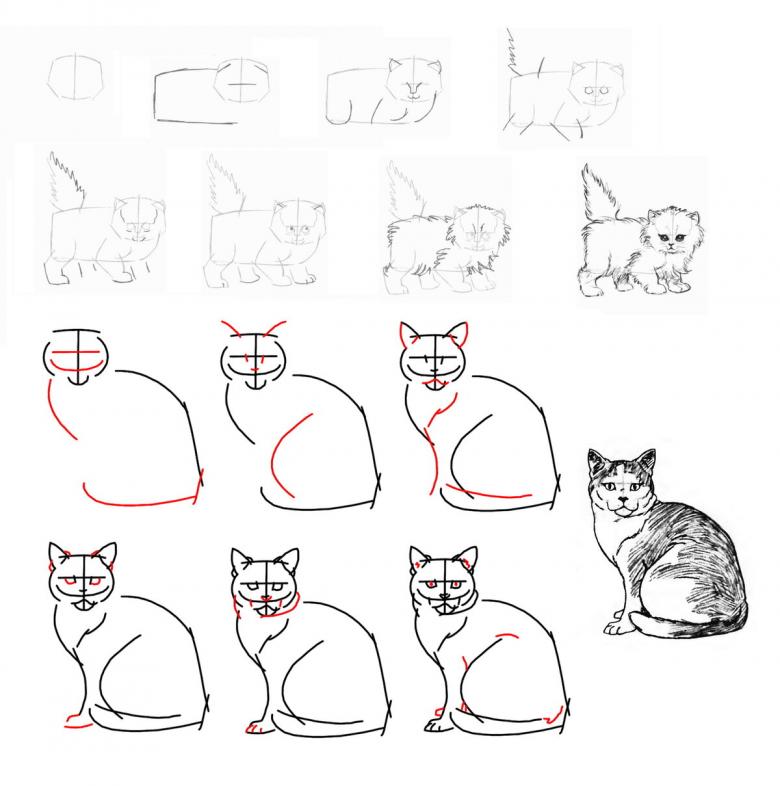
- Mark with an oval the general location of the cat on the sheet of paper. Picture the head with a circle and the body with an oval. Mark the area where the animal is standing with a horizontal line. Use strokes to draw its feet.
- Look up in special literature what parts of the cat's skeleton are made of. You will need this to show the cat in dynamics. Dot the key proportions of the torso. For example, scapula, femur and elbow. This will preserve the proportions of the animal's body.
- Sketch an outline of the figure that characterizes the shape of our object (outline).
- Locally cover the figure with black strokes. Use darker strokes to mark the wool along the outline. This will help give a three-dimensional effect to the drawing.

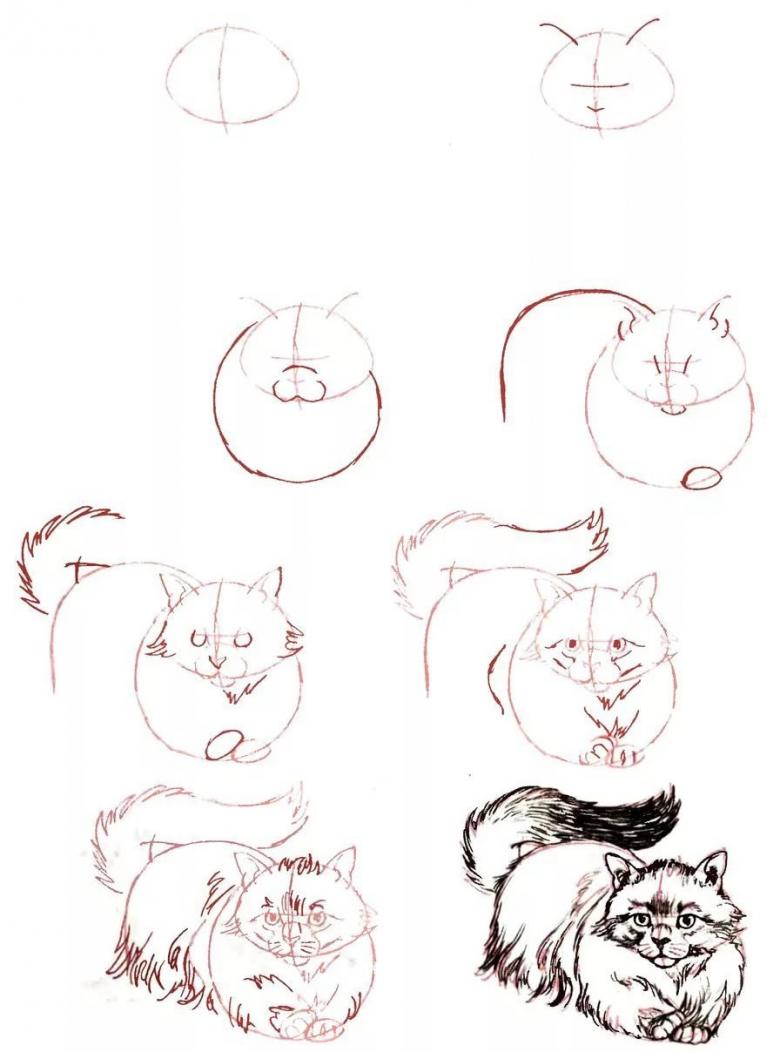
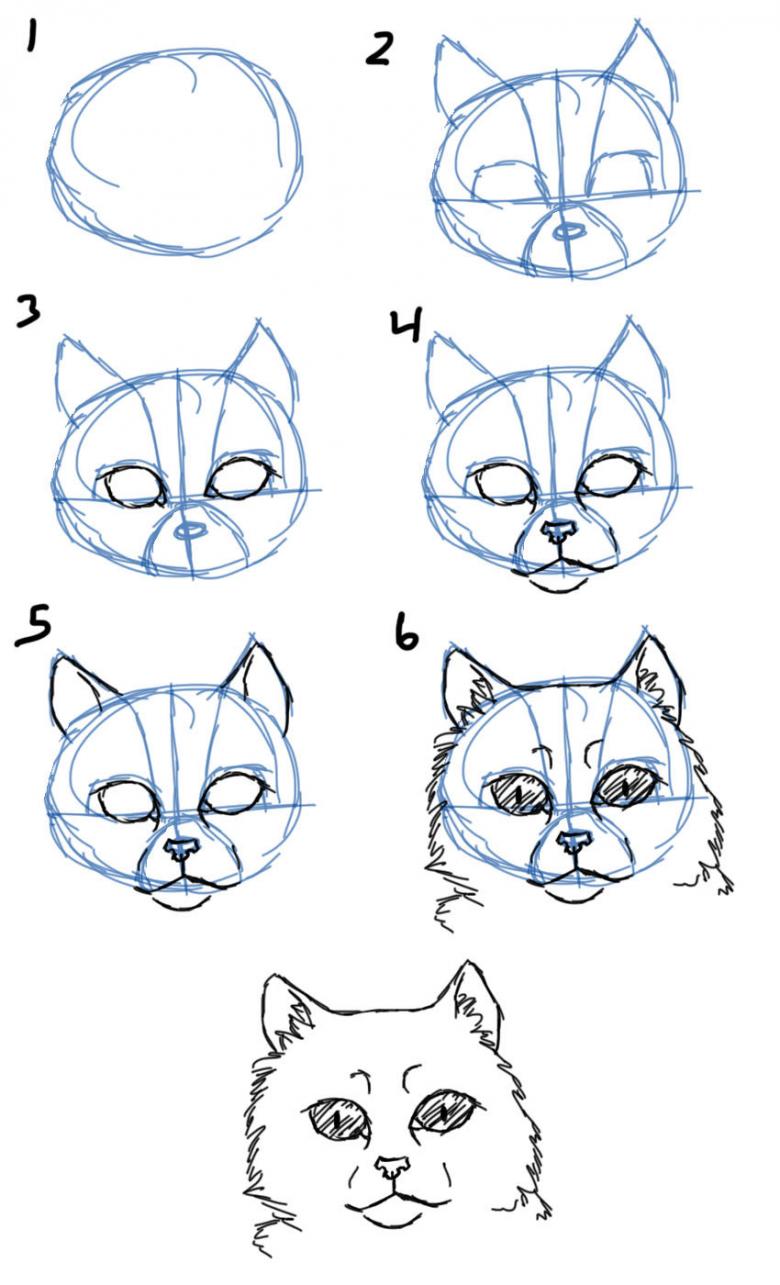
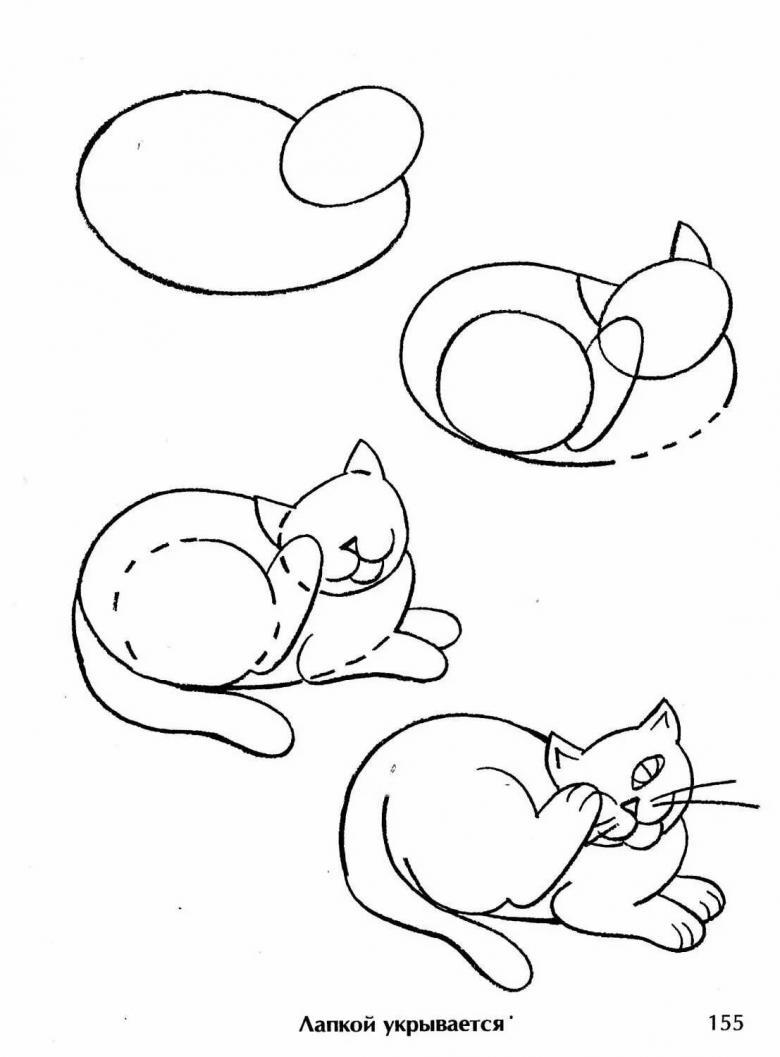
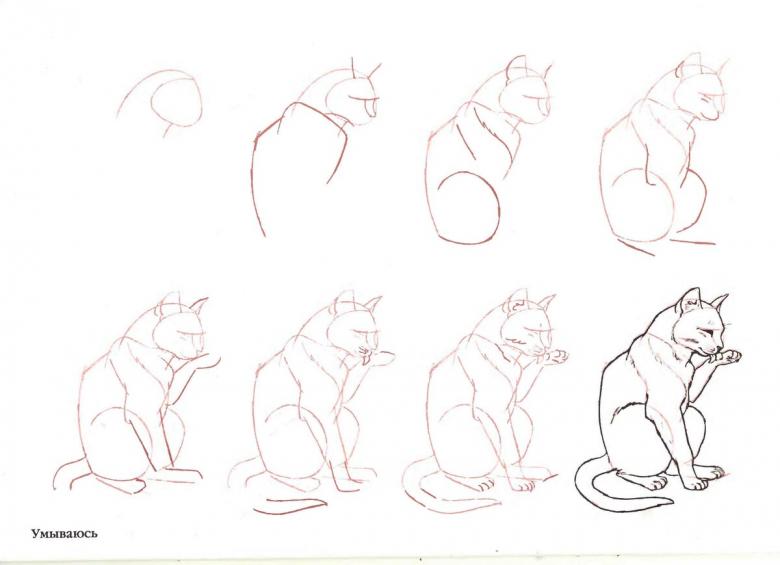
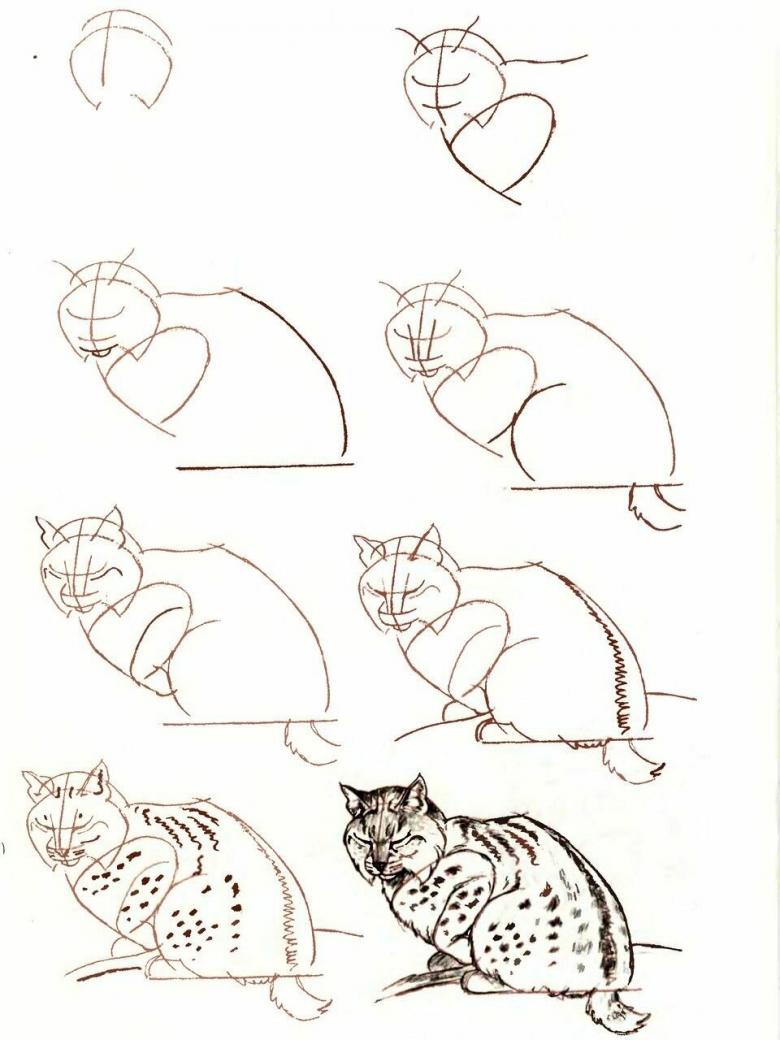
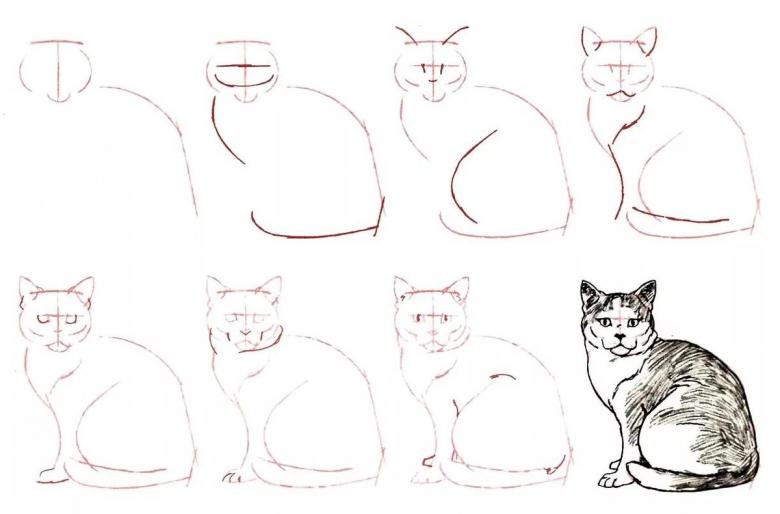
Draw a cat that sits with his head turned sideways.
We recommend that you begin this task by studying the step-by-step diagram.
- First draw a small circle that will symbolize the head. Next draw a larger circle. This will be the body of the cat.
- Inside both circles draw auxiliary lines, as well as ears and tail.
- On the muzzle cat draw eyes, nose, mouth and mustache.
- Ears in the drawing smoothly rounded, and make the contour of the head wavy. This method will help to depict the hair in a more volumetric perspective.
- With auxiliary lines finish drawing animal back, front left leg and neck.
- Doris tail. Erase the auxiliary lines.

Dear friends, in today's drawing class we learned how to draw a cat. Using different techniques, you practiced creating pictures of animals from many different angles. We began our excursion into the world of artists with simple elements.
Using elementary geometric shapes, our young artists learned how to draw a cat peacefully sleeping on the couch. After mastering elementary drawing skills, we pictured a cat waking up and sitting by a bowl of milk.
After that, we watched the cat hunt for mice. Our little artists immediately had the idea to draw a cat in motion. Following a simple algorithm, they successfully coped with the task.

The final task of our lesson today was to draw a cat that sits with its head turned sideways. Using all their accumulated knowledge, the novice artists depicted the cat in this position as well.
This is the end of our lesson today. We are sure the children and their parents got a lot of new impressions for future discoveries. Until we meet again, friends!

