How to Draw a Dog in Pencil - Three Easy Master Classes for Beginners
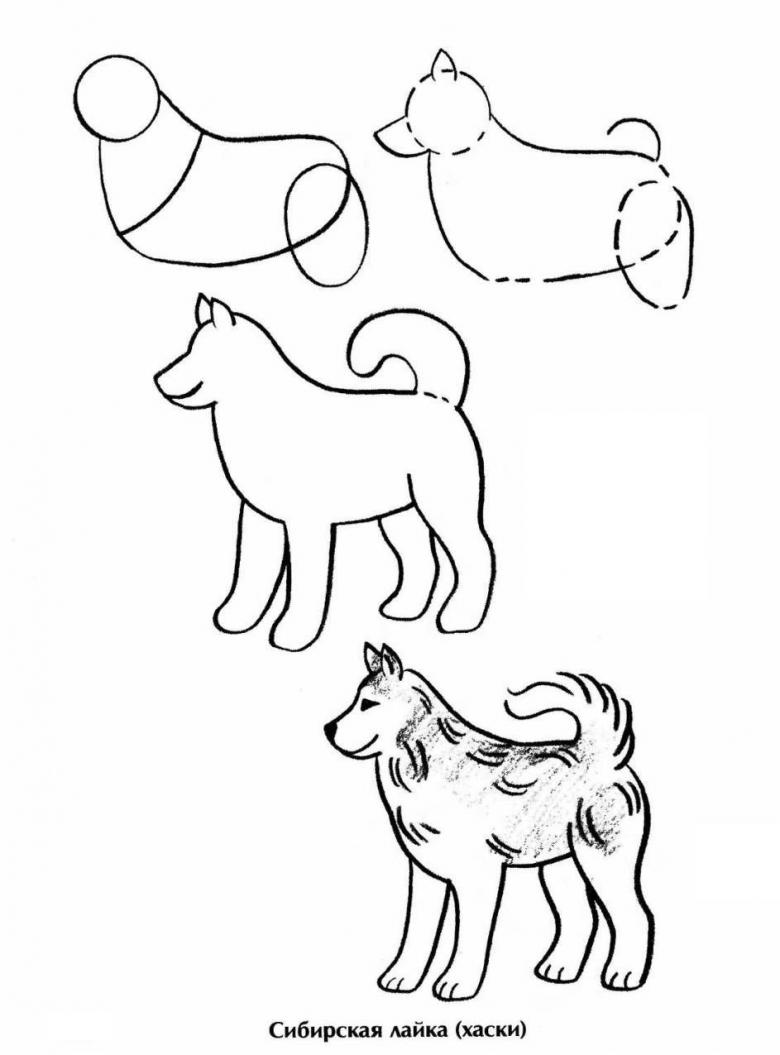
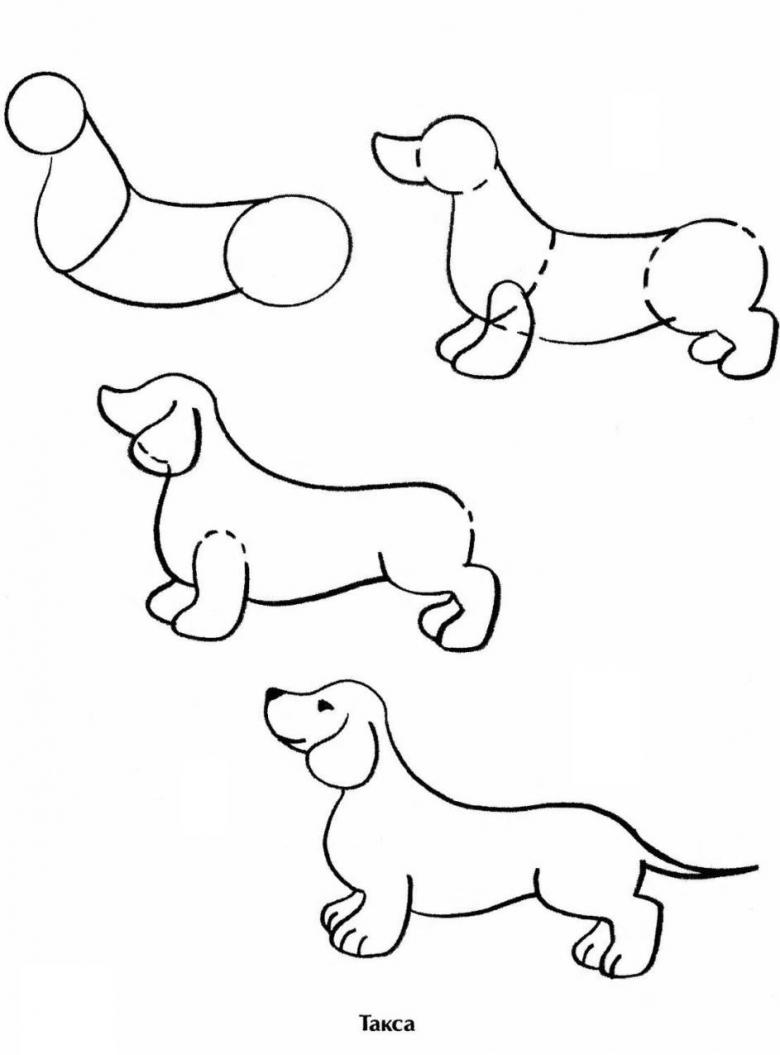
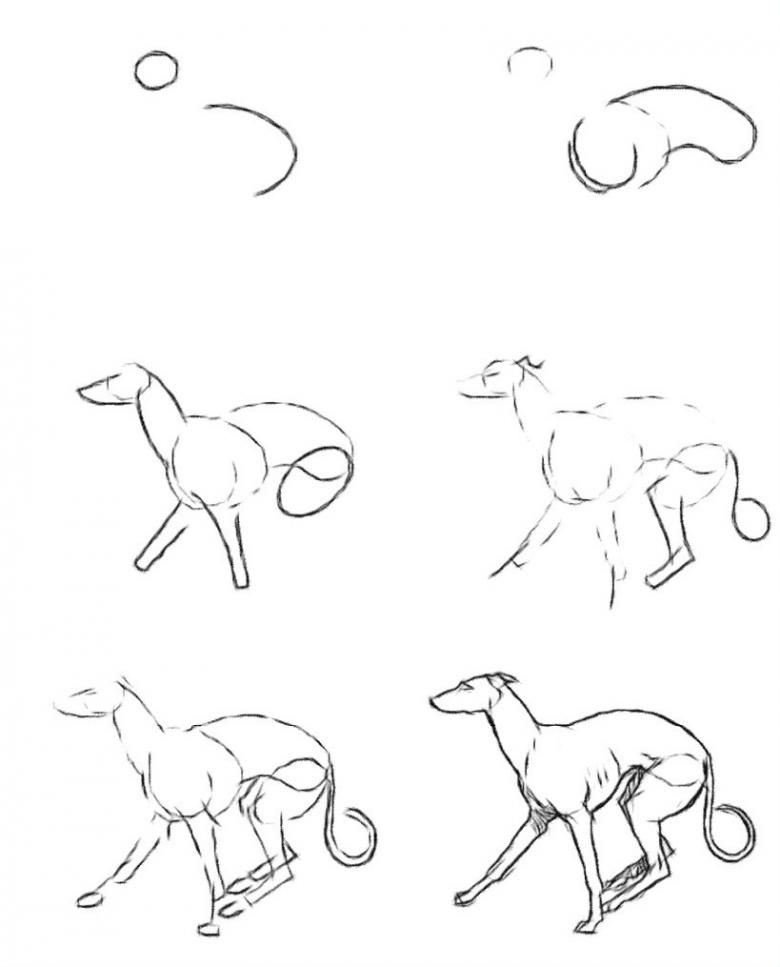
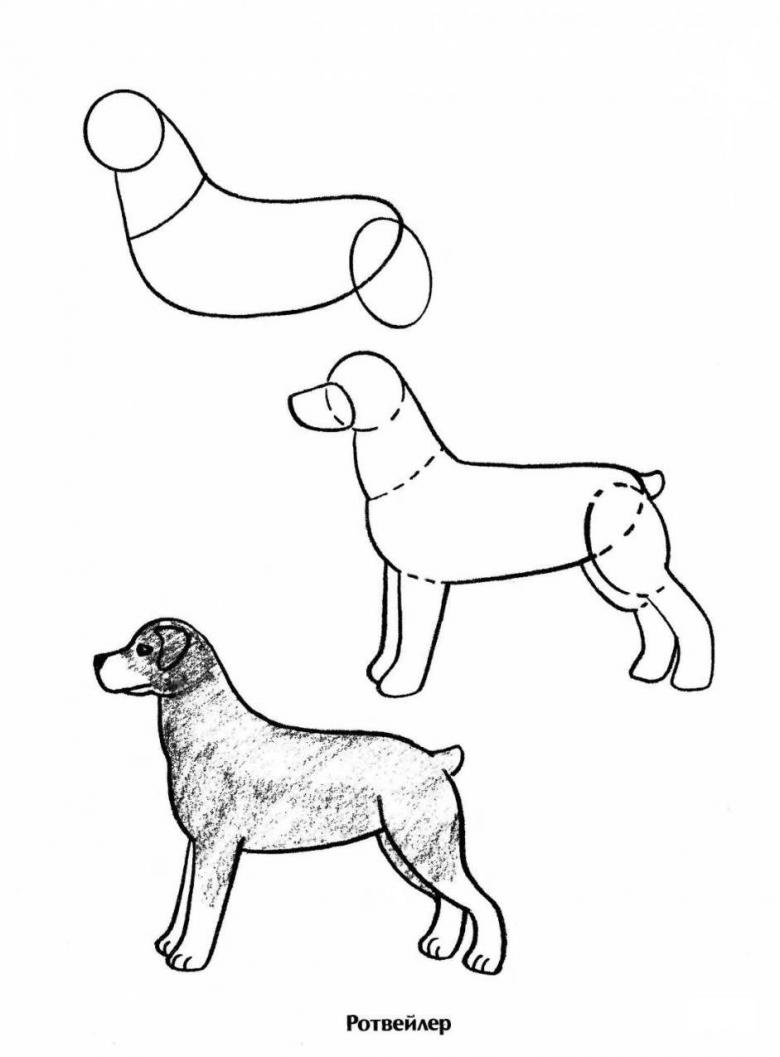
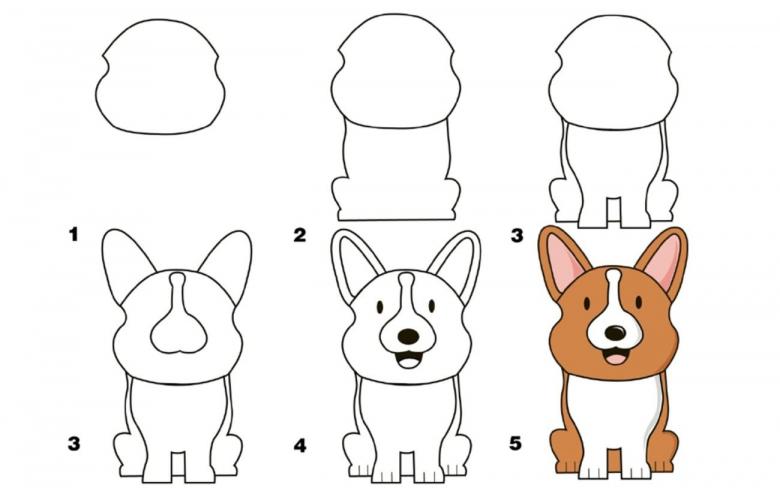
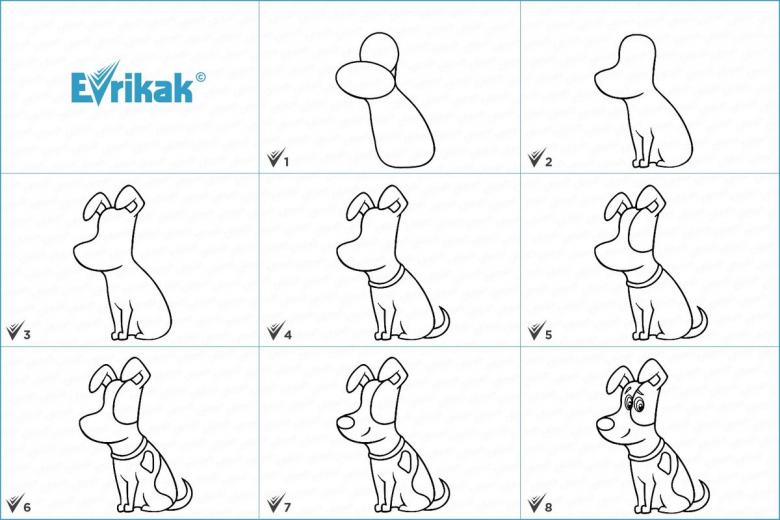
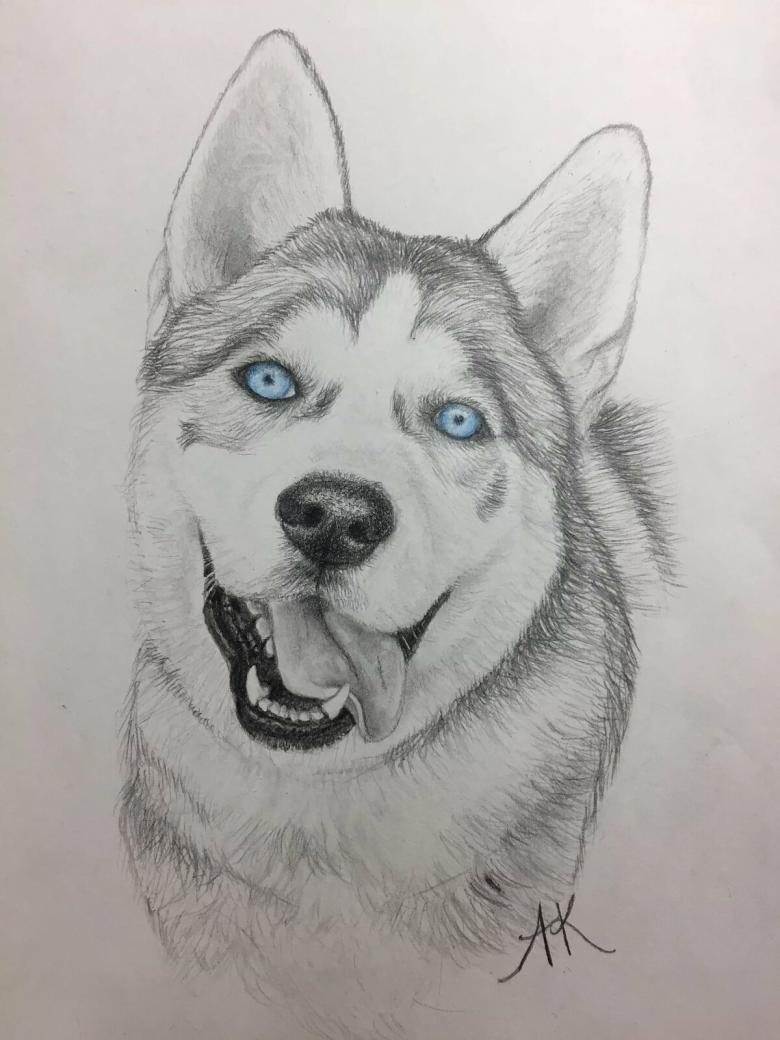
During drawing lessons, a child can be offered to learn how to draw a dog with a simple pencil. This pet is represented by a variety of breeds. Having mastered the technique of drawing with a simple pencil dog, you will be able to learn how to create realistic images and draw cartoon puppies.

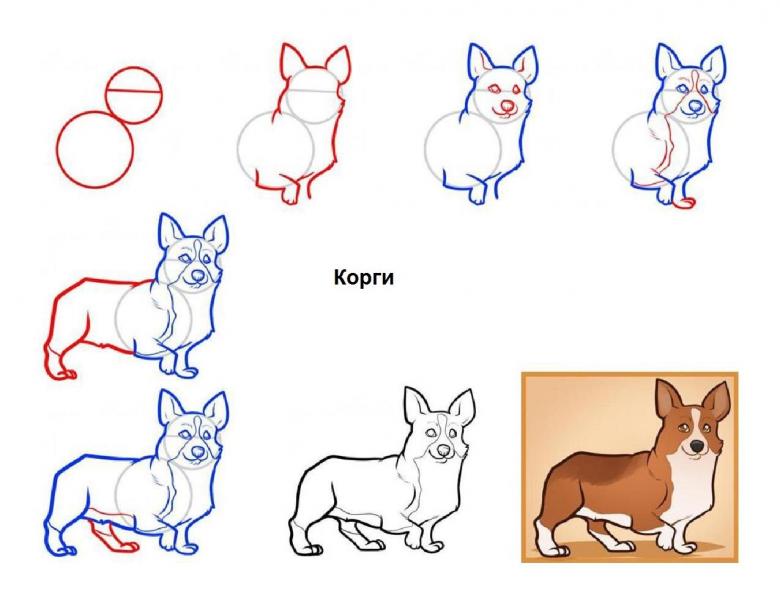
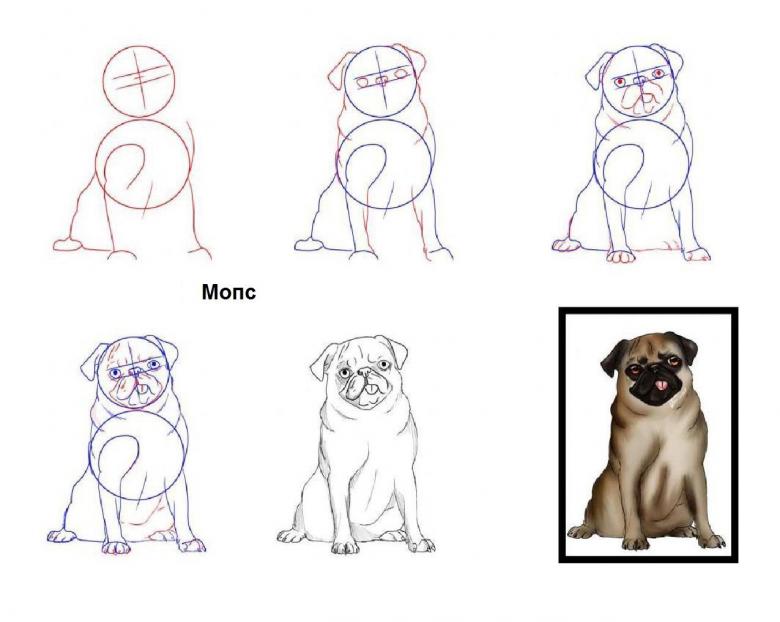
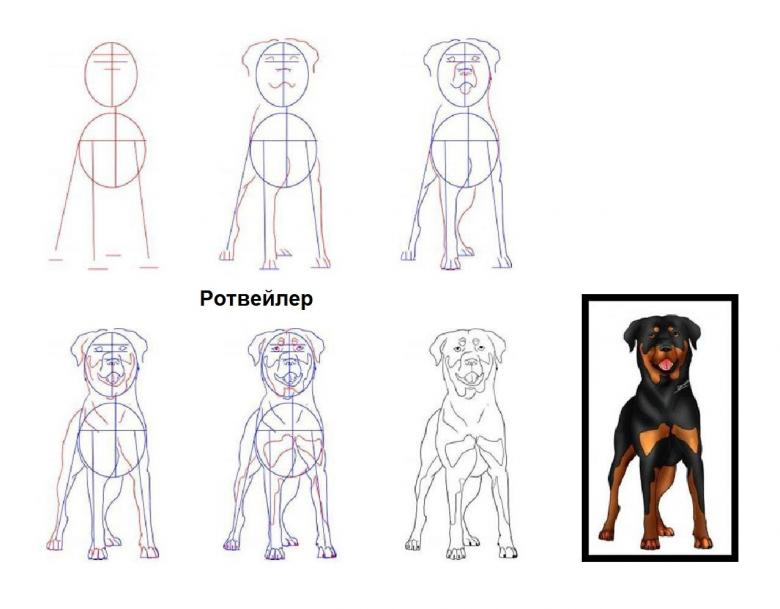
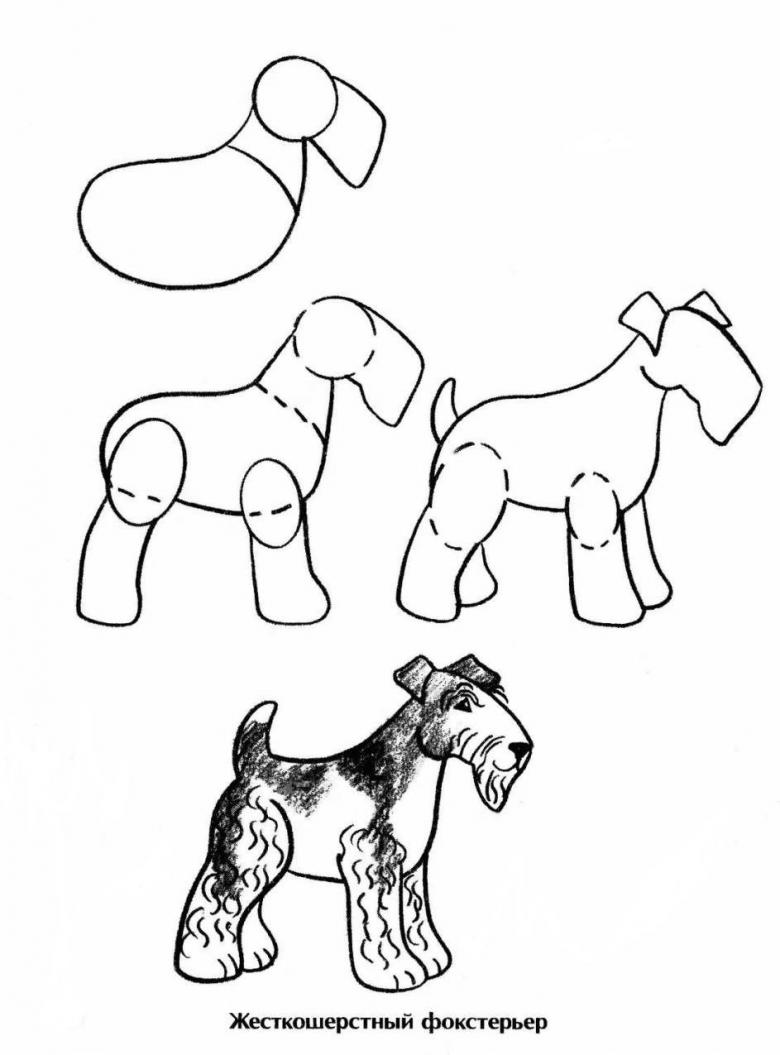
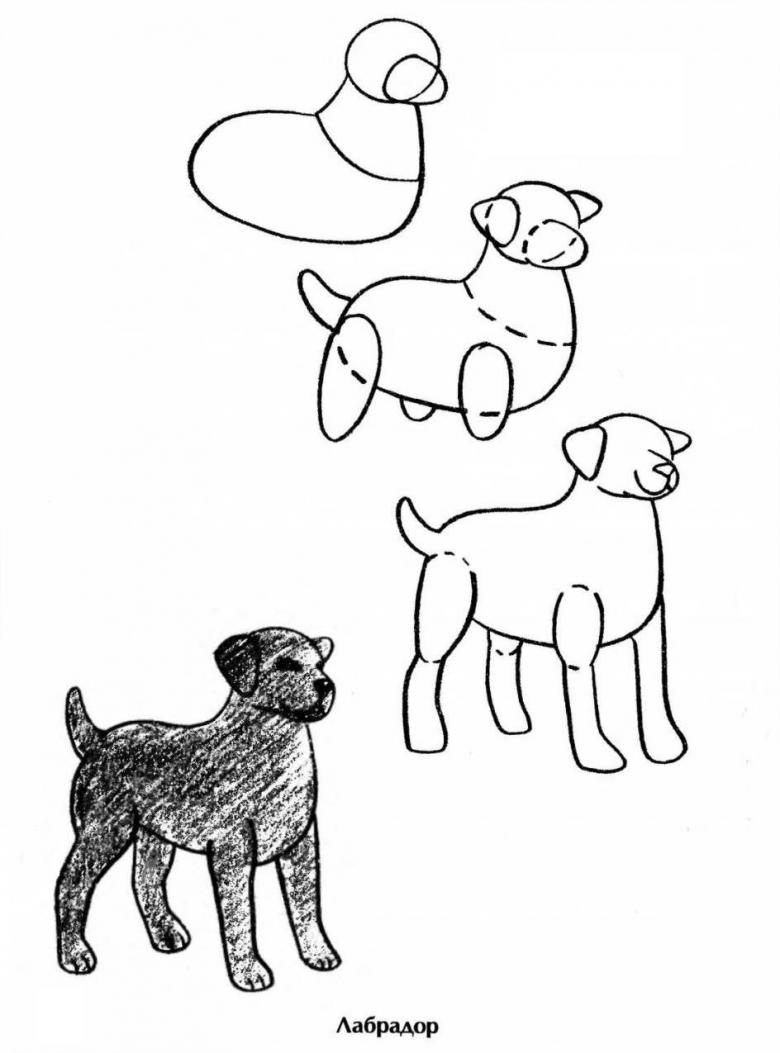
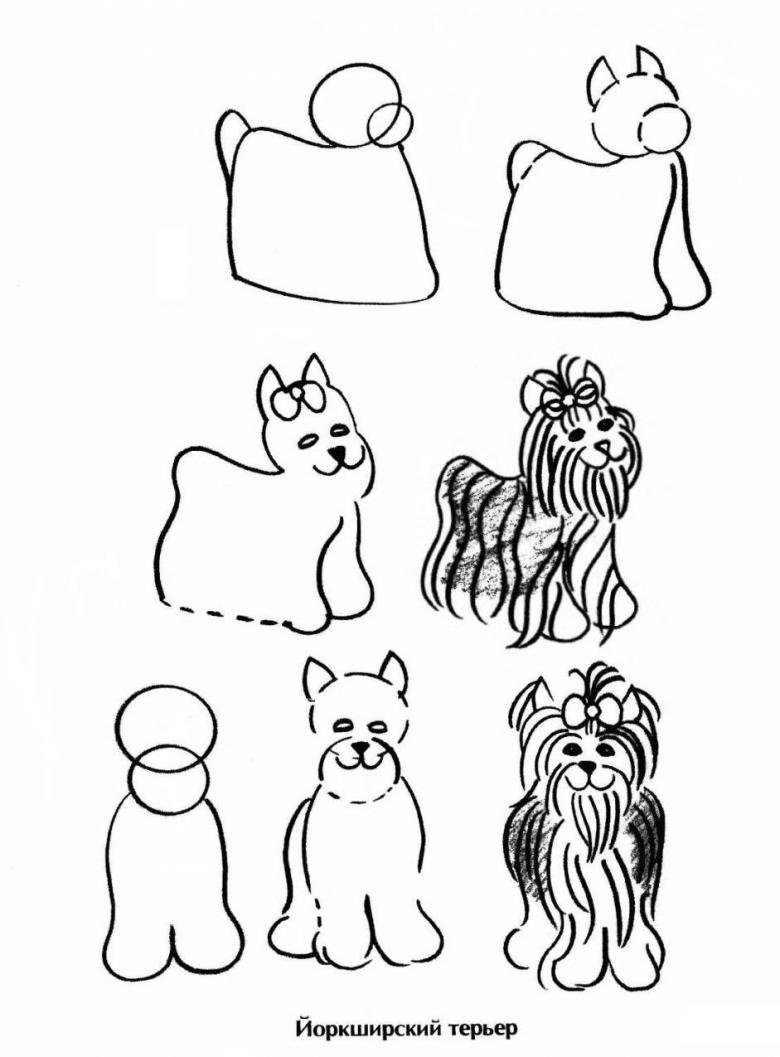
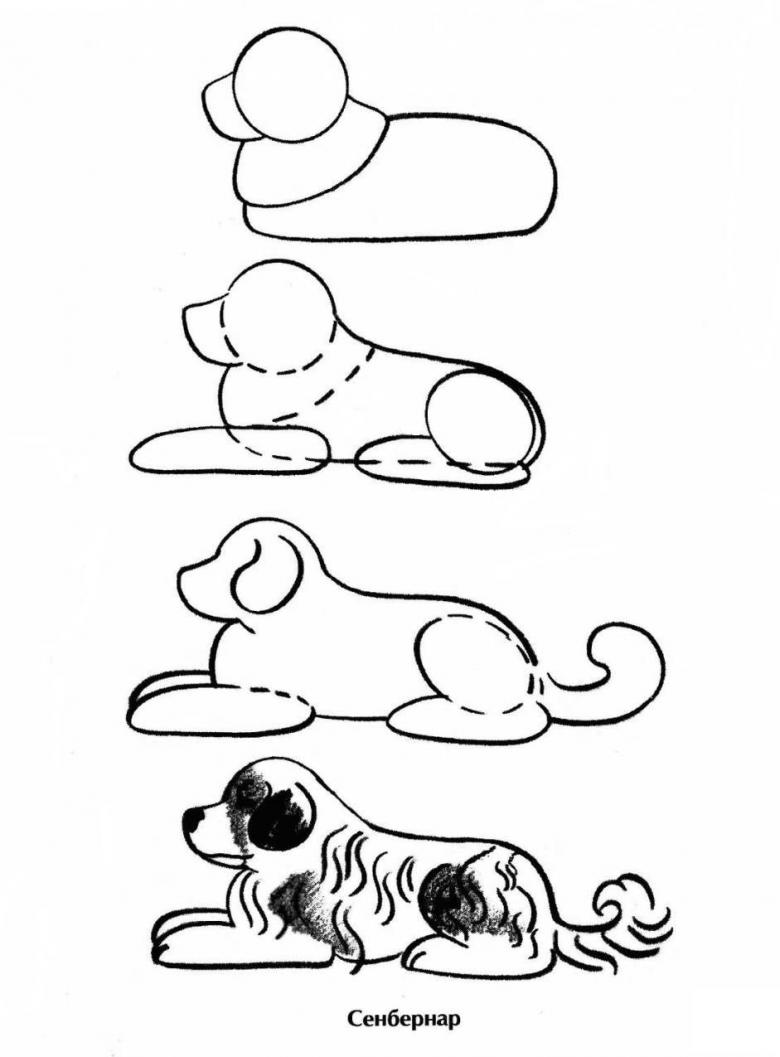
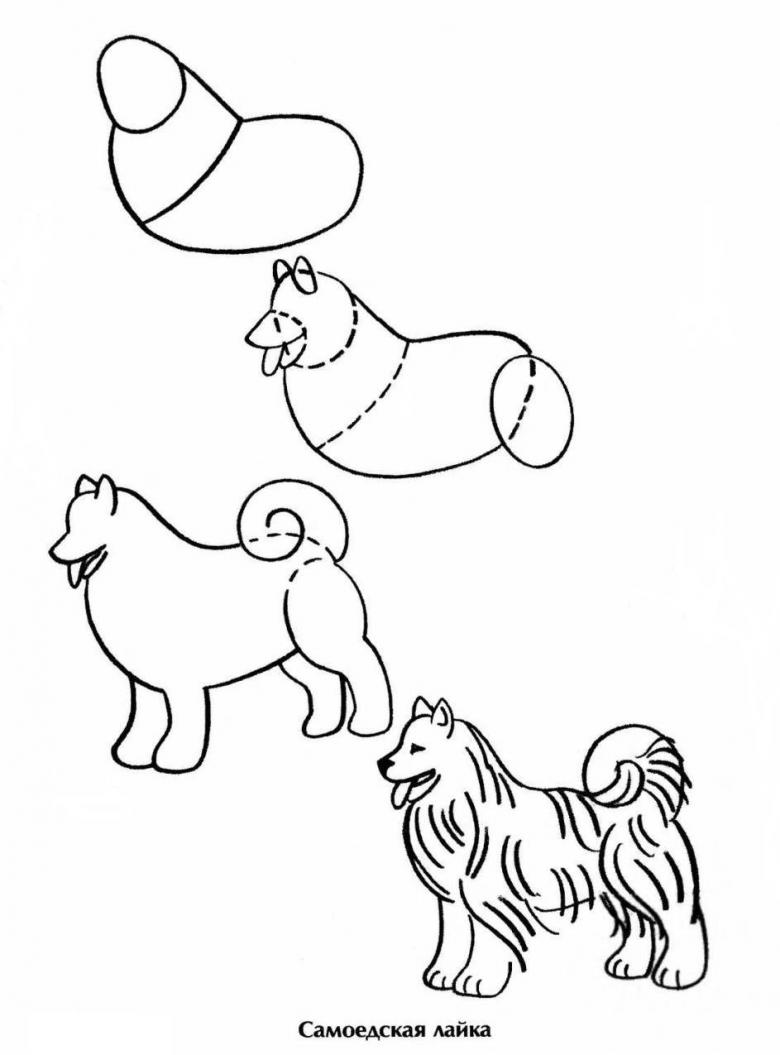
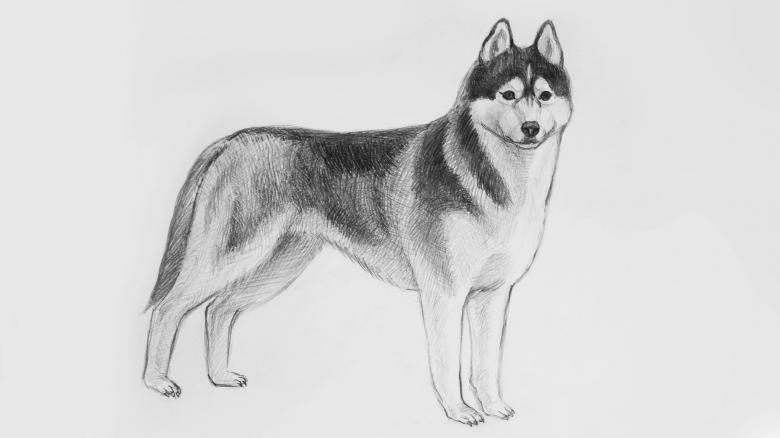
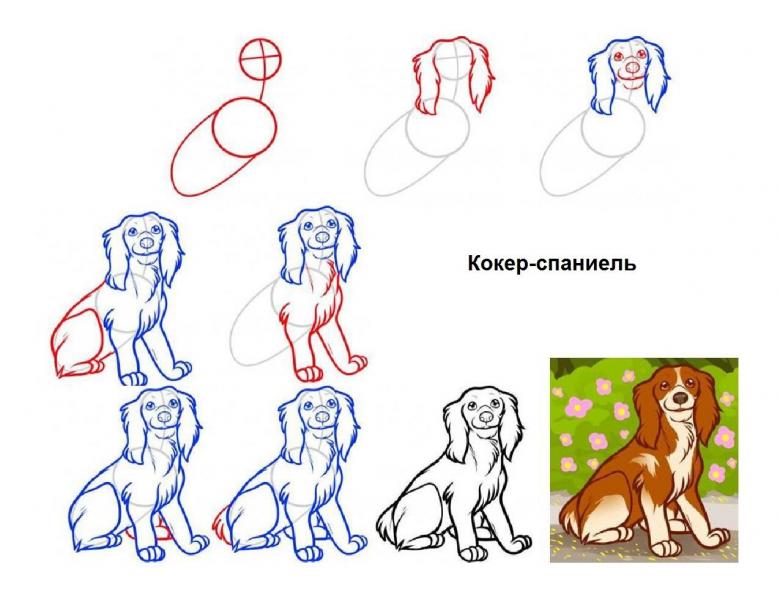
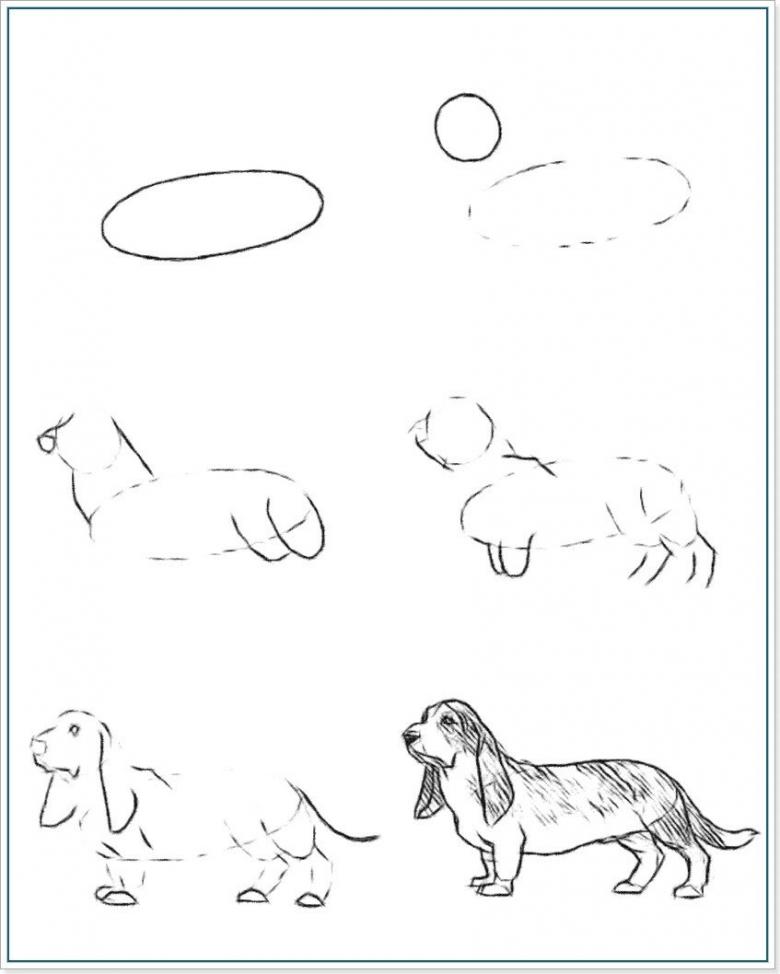
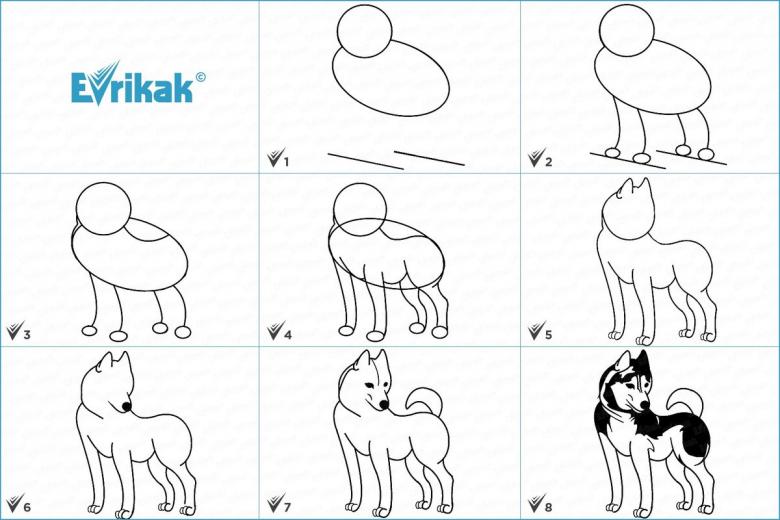
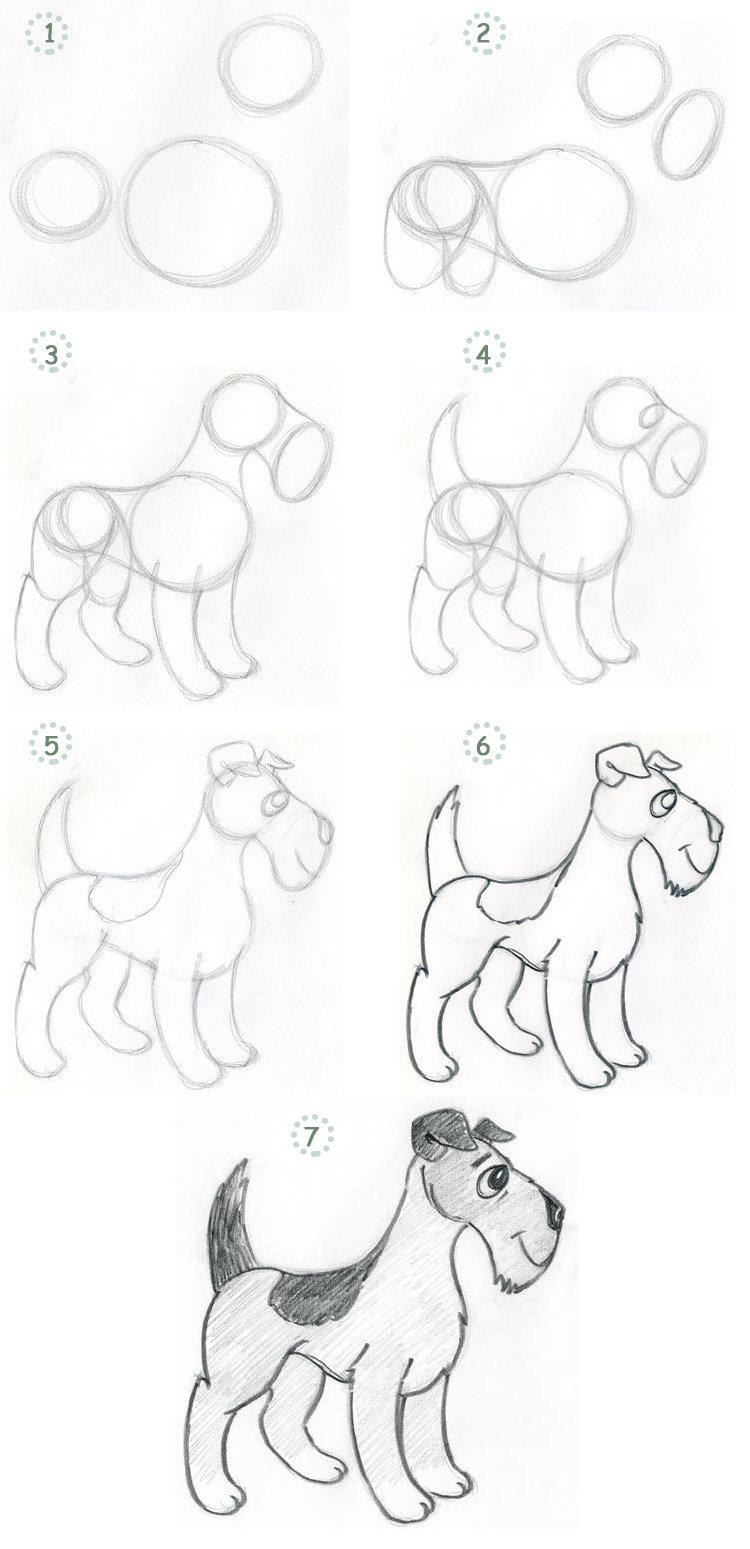
The basic steps for creating a picture of any type are the same. Below will be a step-by-step drawing of realistic dogs of different breeds and fairy tale characters of favorite cartoons.
Drawing a dog: the basic rules of drawing
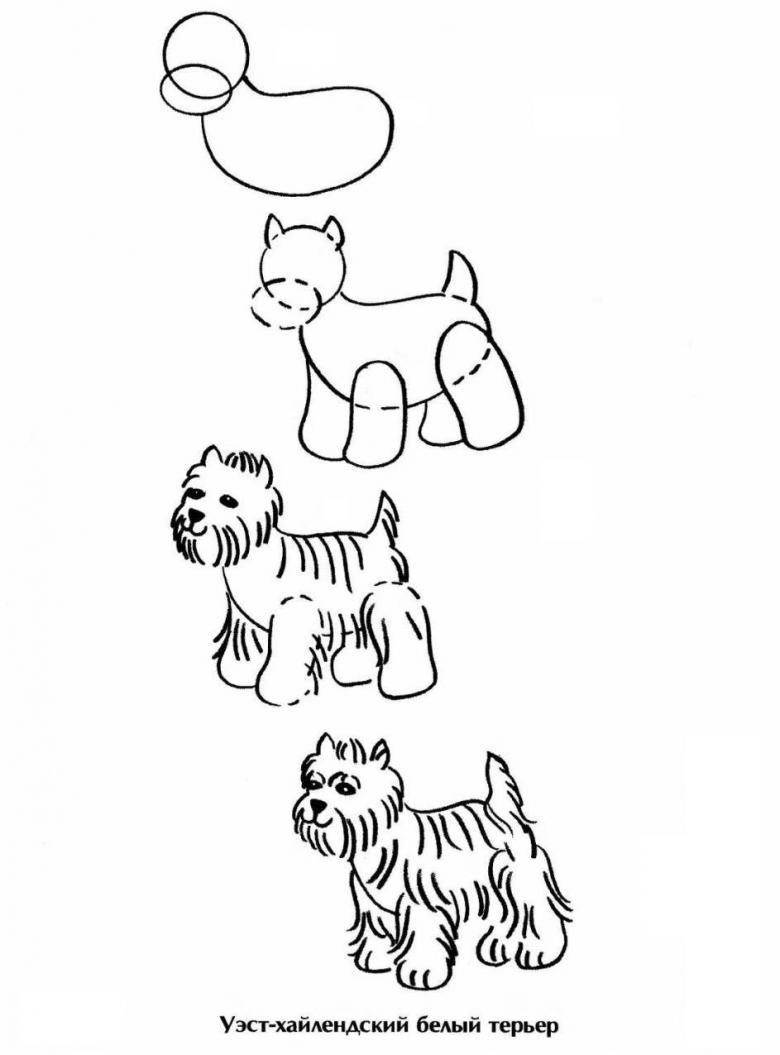
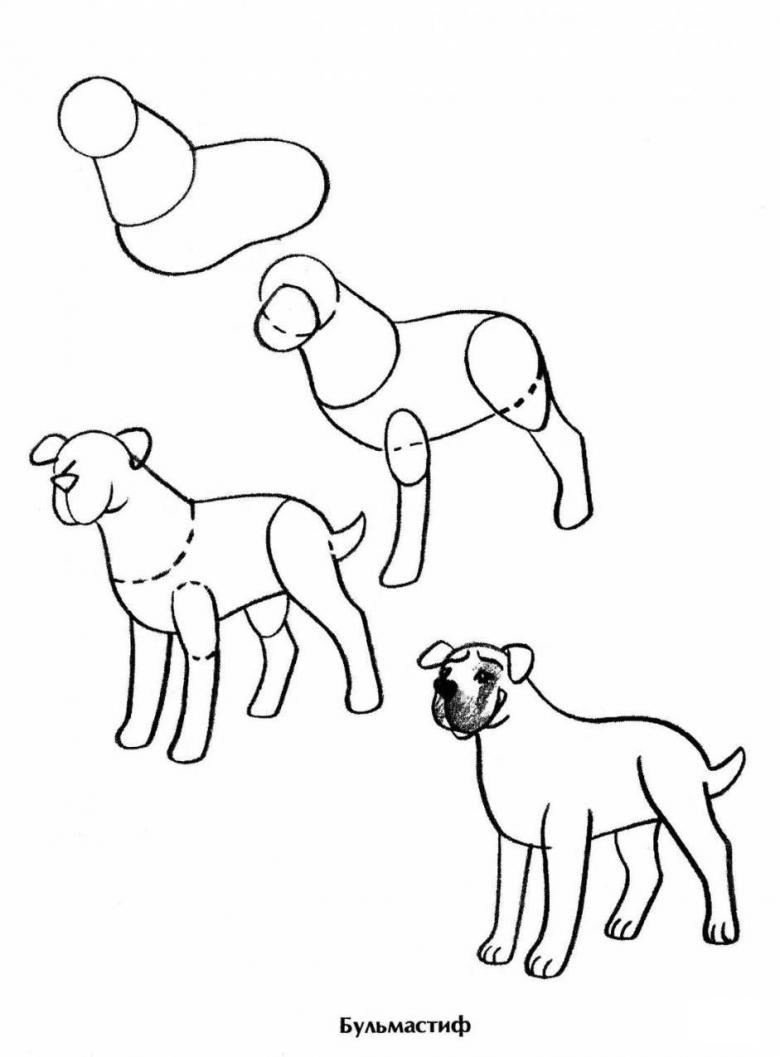
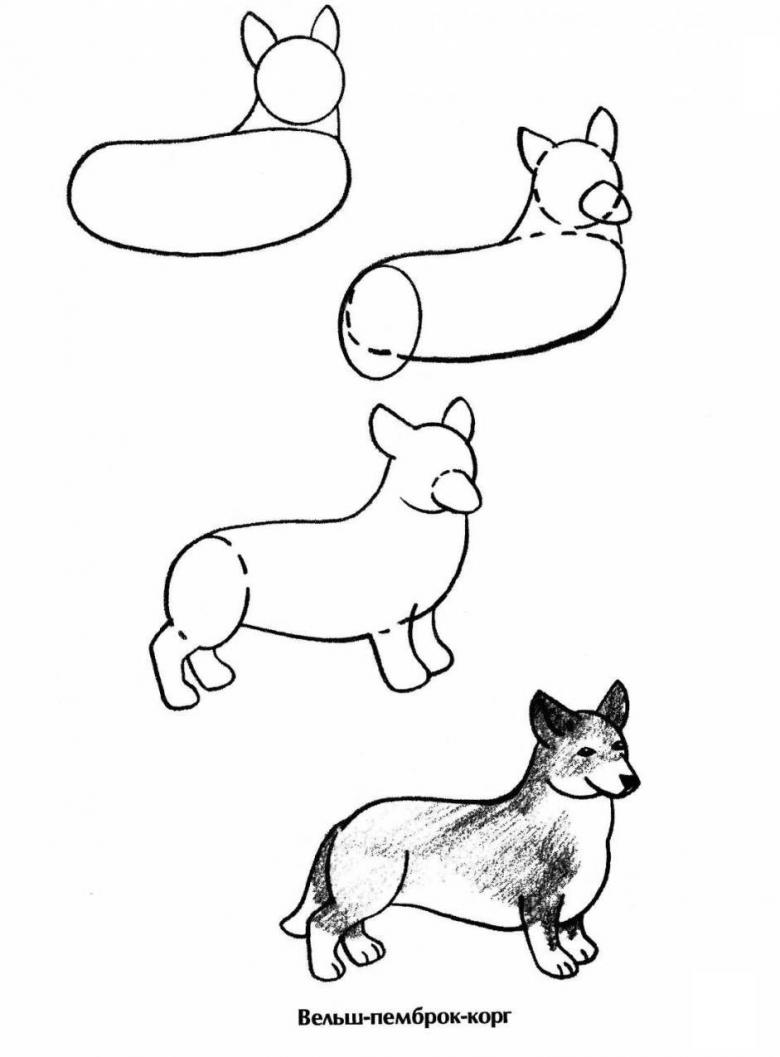
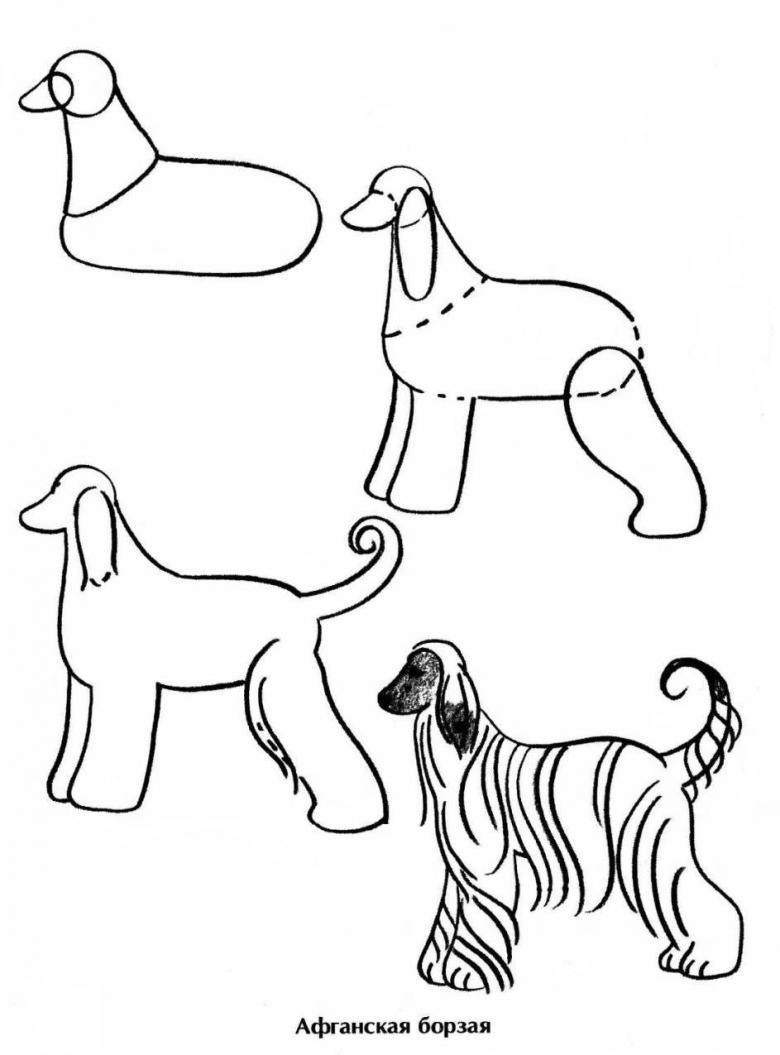
To create any drawing, the artist first draws the outlines of the image, using various geometric shapes:
- circles;
- ellipses;
- rectangles;
- squares;
- triangles.
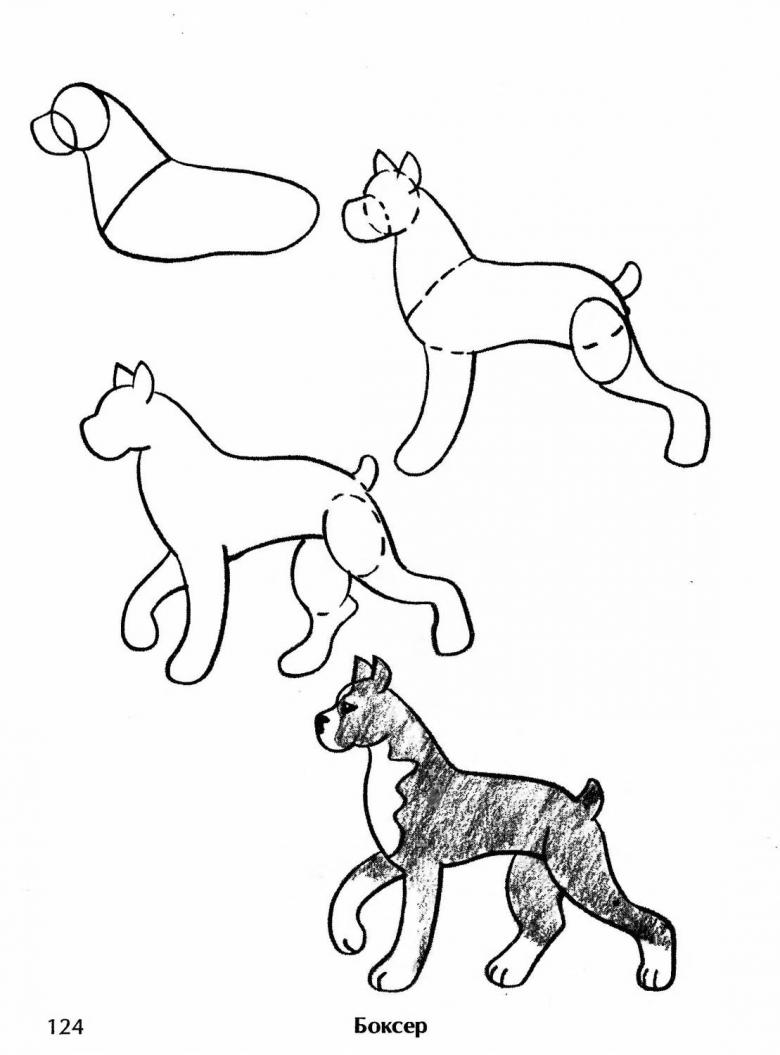
They are then easily used to draw individual elements of an animal or other creature depicted on a sheet of paper. In art schools, everyone has to learn how to create such bases for drawings. Parents can conduct lessons themselves, showing the baby, step by step, how to draw a favorite dog.
To work you need to take:
- A white sheet of heavy drawing paper;
- a soft simple pencil;
- elastic eraser.
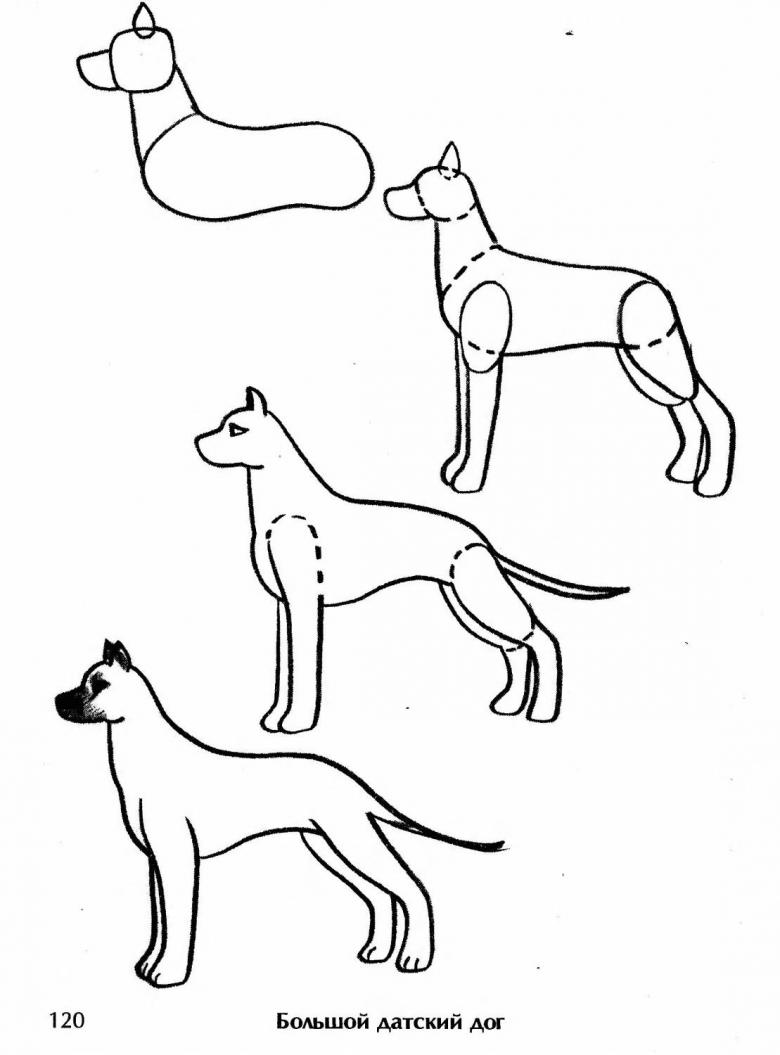
Important! Starting to draw with a simple pencil from its outline, you should put a photo or a sample of a cartoon character nearby. They will help to choose correctly the form of an outline. If the pattern has rounded shapes, a circle is placed in the base. For sharp dog ears the outline will be rectangles, and for floppy ones - ovals or circles, etc.
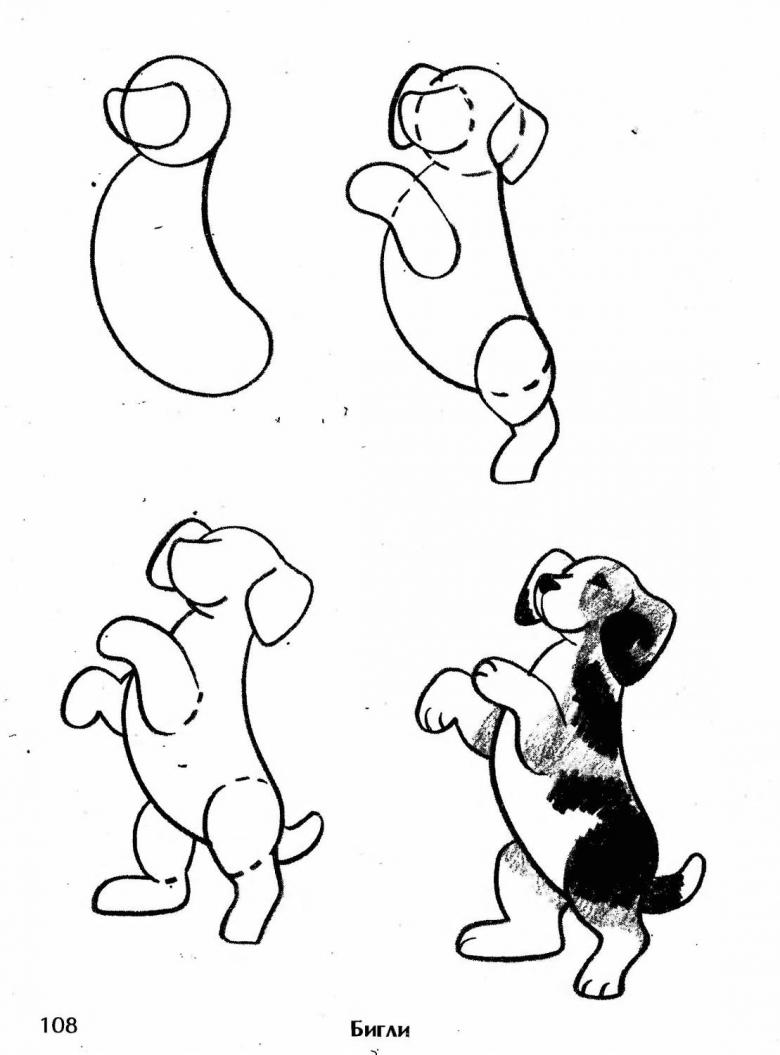
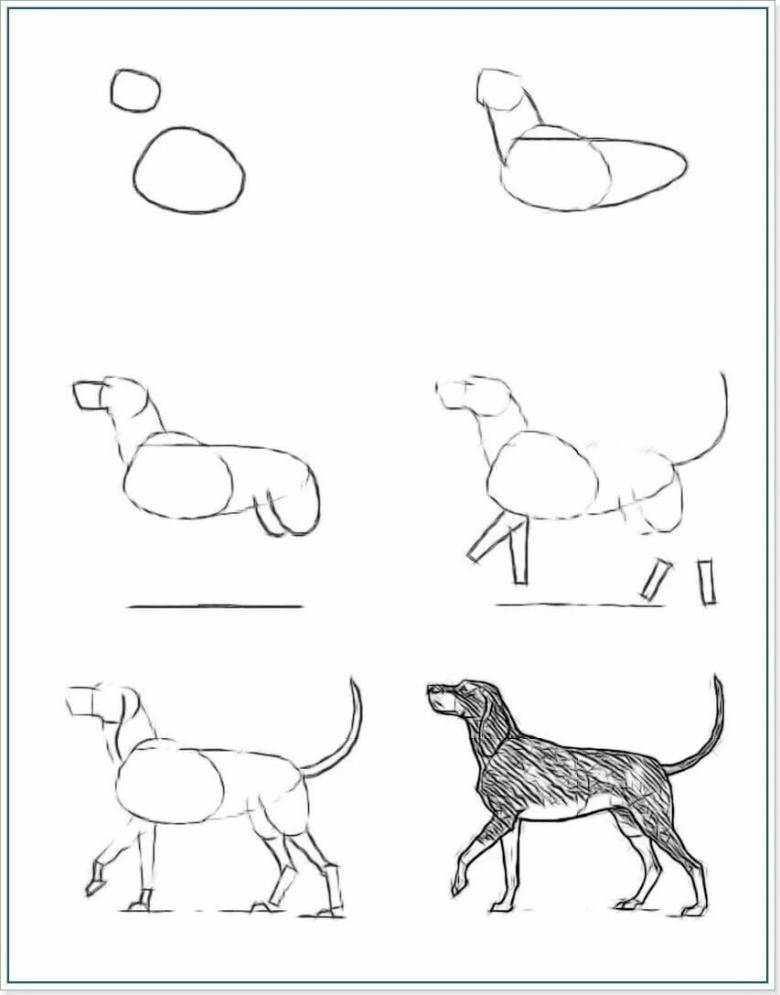
Drawing a sitting Doberman in profile
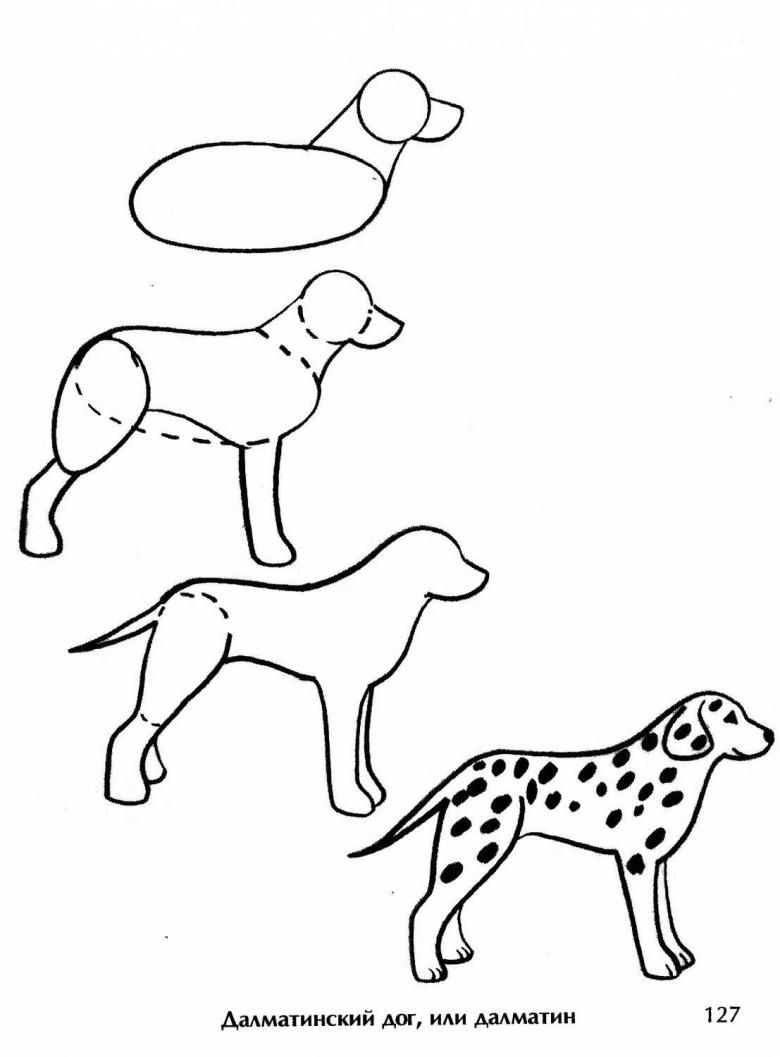
To draw a sitting, realistic sketch of a sitting Doberman, you start by creating the outlines of the animal in the form of circles, rectangles and other geometric shapes. The Doberman breed has a pronounced musculature of the body, so drawing a picture of such a dog will be clearer and easier for a child.
- First a small circle is drawn, which will be the base of the head. Before that, it is necessary to take into account the size of the sheet and the drawing, so that the picture of the animal would fit completely on the sheet.
- Then you need to create an outline for the muzzle and nose, drawing on the side of the outer circle outline of a rectangle slightly irregular in shape.
- At the top, in the place where the animal should have ears, you should draw two triangles.
- Then draw two straight parallel lines from below in the neck area. This is how the contour of the neck is created.
- Then, right below the future neck, the contour of the upper part of the Doberman's body is created with a vertically placed oval.
- Then the outline of the lower part of the dog's torso is created with a small vertical oval overlapping the upper oval outline.
- For the lower part of the Doberman's back, another small vertical oval is drawn, overlapping most of it with the middle contour.
- To create the contour of the dog's back it is necessary to connect the largest oval to the smallest oval in a straight line as shown in the photo.
- After creating the contour of the back, create an outline of the front paws. To do this, draw two parallel lines on the bottom of the upper oval, which are connected by short segments separately.
- The next step is to create an outline of front and rear paws. To do this, draw rectangles in the front at the end of the front legs and rectangles coming from the smallest last oval.
- Then, from the outer contour of the smallest oval, draw a curved line going upwards, which will be the base of the animal's tail.
- To create the shoulder of the front paw you need to draw a small vertical oval just above its outline. It should be located inside of a large oval.
- The next step is to draw each detail of the created contour. To start the tracing all of the created forms in a single line to combine them into a single overall figure of a dog. Then begins tracing the details of the head:
- eyes;
- nose;
- mouth;
- ears.
- Then the details of the paws, neck, tail and torso are drawn.
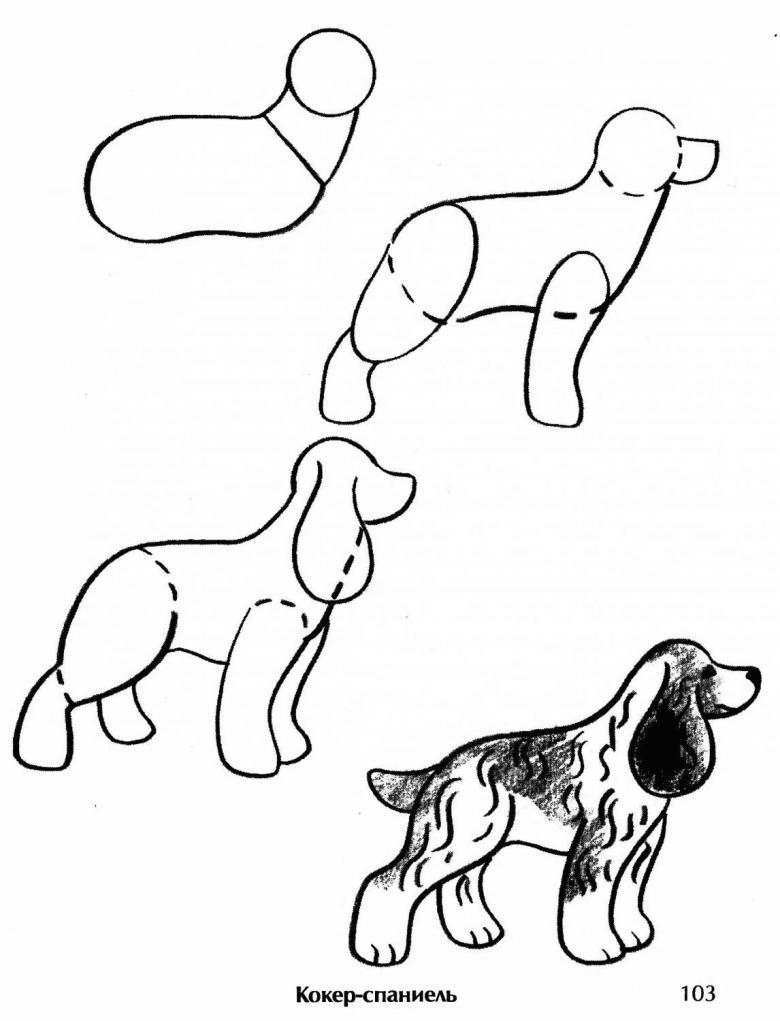
After drawing the details, it is necessary to erase all the auxiliary lines from the drawing with an eraser, so that the silhouette of the Doberman is left, similar to the pictures that are printed in coloring books.

To make a picture of a dog realistic, you need to color it in the shades that are typical of the breed. They will help to make the flat picture more relief and volume.
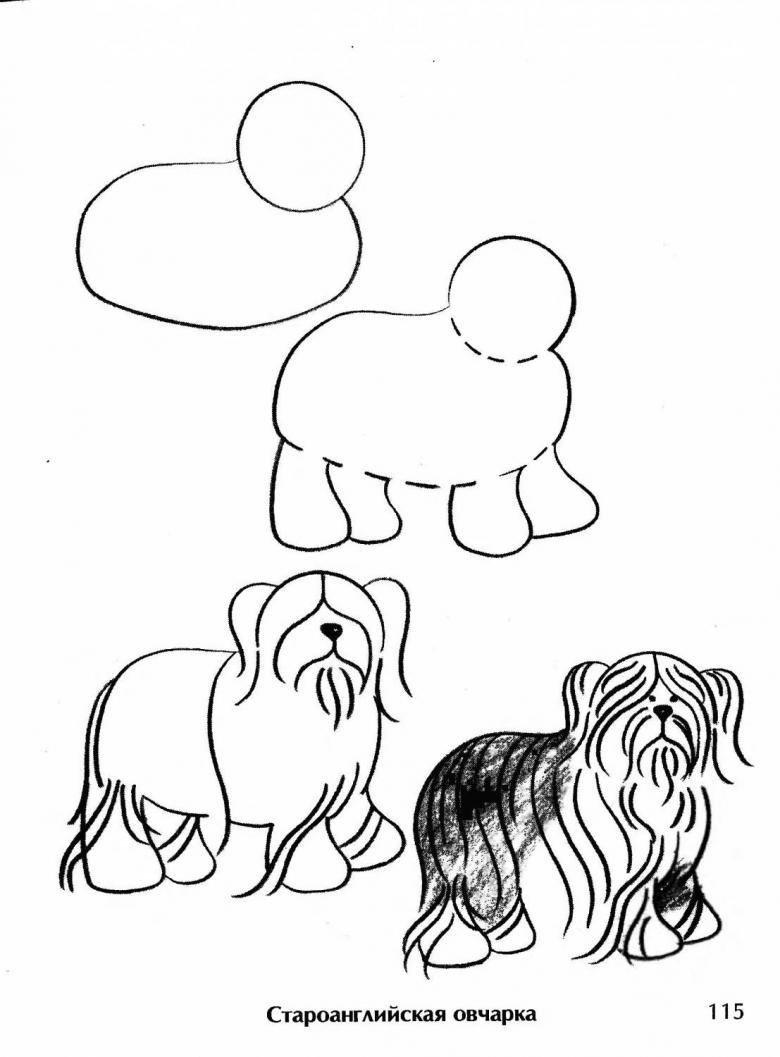
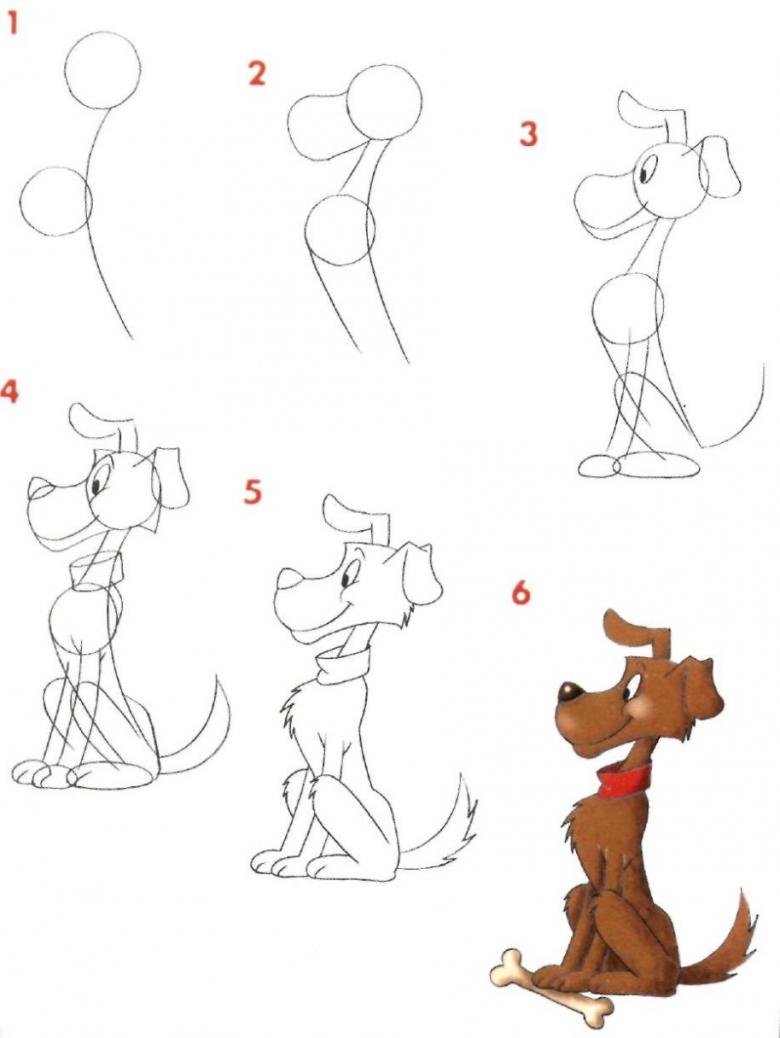
How to draw a cartoon puppy
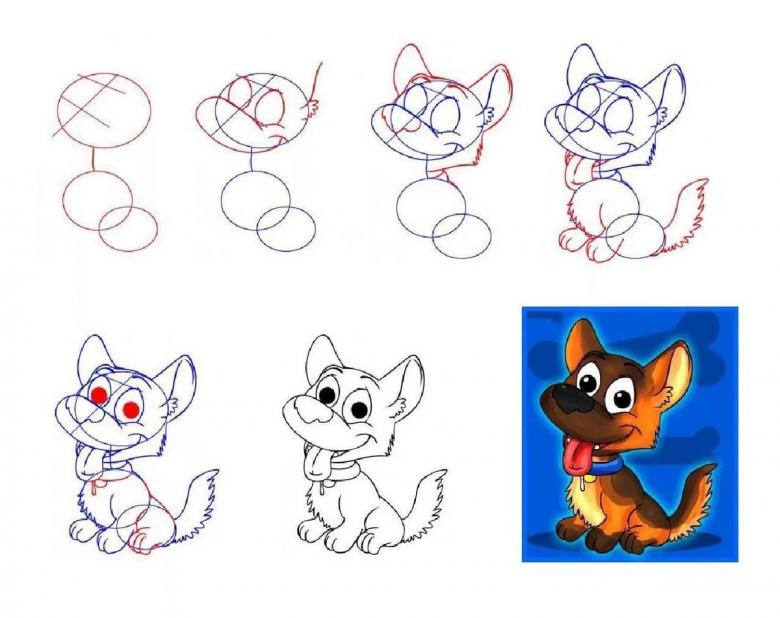
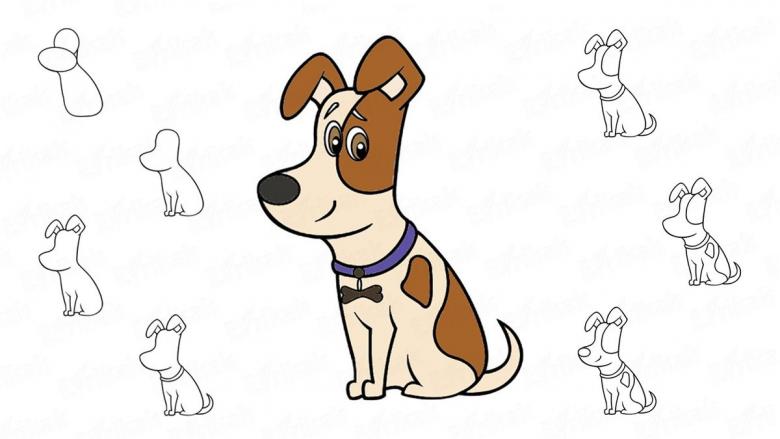
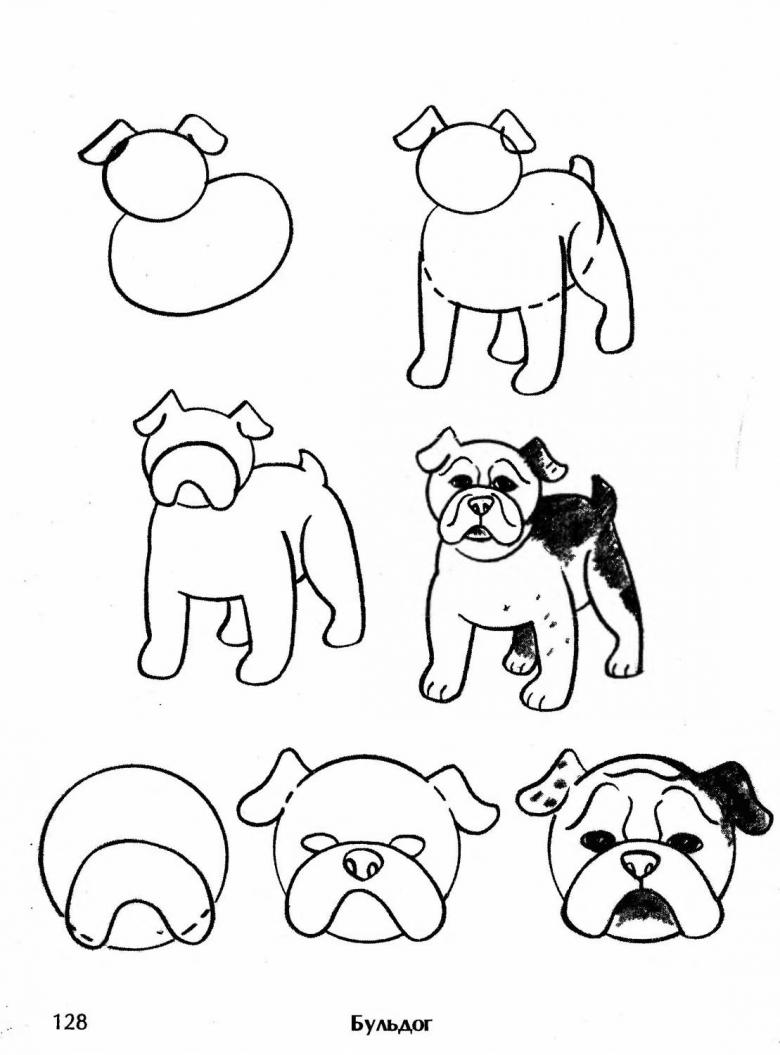
According to the same scheme step by step, you can draw a puppy from a cartoon. It will be dominated by round and square outlines.
- To begin with, the outline of the head is drawn in the form of a circle.
- To create the outline of the muzzle, an oval is drawn, overlapping at the bottom of the circle.
- Inside the circle, two small ovals are drawn with a simple pencil, one inside the other, which will be the eyes of the cartoon puppy.
- Inside the oval denoting the muzzle, a small circle is drawn, which will be the nose.
- Underneath it, you should draw two curved upward lines that look like a segment of a circle. They will become the outline of the puppy's mouth from the cartoon. The lines should resemble an English beech "w" with smooth angles.
- Using a free geometric figure, it is necessary to draw the outline of a hanging ear, located on the top of the head.
- The second ear must be drawn in similar geometric shapes.
- Under the circle inside the oval, a horizontal rectangle must be drawn, which must overlap the oval.
- Under the rectangle you need to draw a square, which will be the outline of the upper part of the torso of the puppy. He must have one convex side and slightly overlap with the rectangle.
- After drawing a large square with a convex side, which will be the central part of the body of the dog. The convex side will mark the tummy of the puppy.
- The lower part of the body is depicted in the form of an arbitrary figure with smooth angles.
- On the lower part of the back you need to draw a small circle or oval, which will be the back paw of the puppy.
- From the upper part of the body to draw two slightly curved parallel lines, which should be connected at the bottom. This will be the front paw.
- A small oval is drawn at the bottom of the front leg, which will be the outline of the foot.
- Then the second front leg is drawn in the same way as the first, along with the foot.
- From the upper side of the lower back a short line is drawn curving to the top. This will be the outline of the tail.
- After completing the step by step outline of the parts of the puppy figure, you need to carefully draw all the details and connect the individual body parts and the head with one line.
- Then you need to erase unnecessary lines of the sketch with an eraser, leaving only the drawn outline of the coloring puppy.

Children can create their own drawings for coloring, drawing pictures of their favorite animals and cartoon characters. Such drawing activities develop fine motor skills, abstract thinking, sense of shape and color.


